How to Create and Use Forms in Email
Email marketing continues to evolve, offering new ways to interact directly with audiences. Static emails no longer meet users’ expectations — they want interactive, personalized content that allows them to take action without leaving their inbox.
AMP technology for email unlocks new possibilities by integrating dynamic elements and feedback forms directly into emails. In a previous article, we covered the basics of working with AMP-list in email campaigns. In this article, we’ll focus on the AMP-form component — a key tool for creating forms inside emails. It enables real-time user interactions such as collecting data, confirming actions, and building fully functional in-email experiences. We'll explore how to use AMP-form effectively in email marketing and how to integrate it with Pixcraft.
What is AMP-form
AMP-form is an AMP component that allows you to create forms directly inside an email, without needing to redirect the user to another page. With it, you can add to your email:
- Event registration.
- Feedback collection.
- Newsletter subscription.
- In-email surveys.
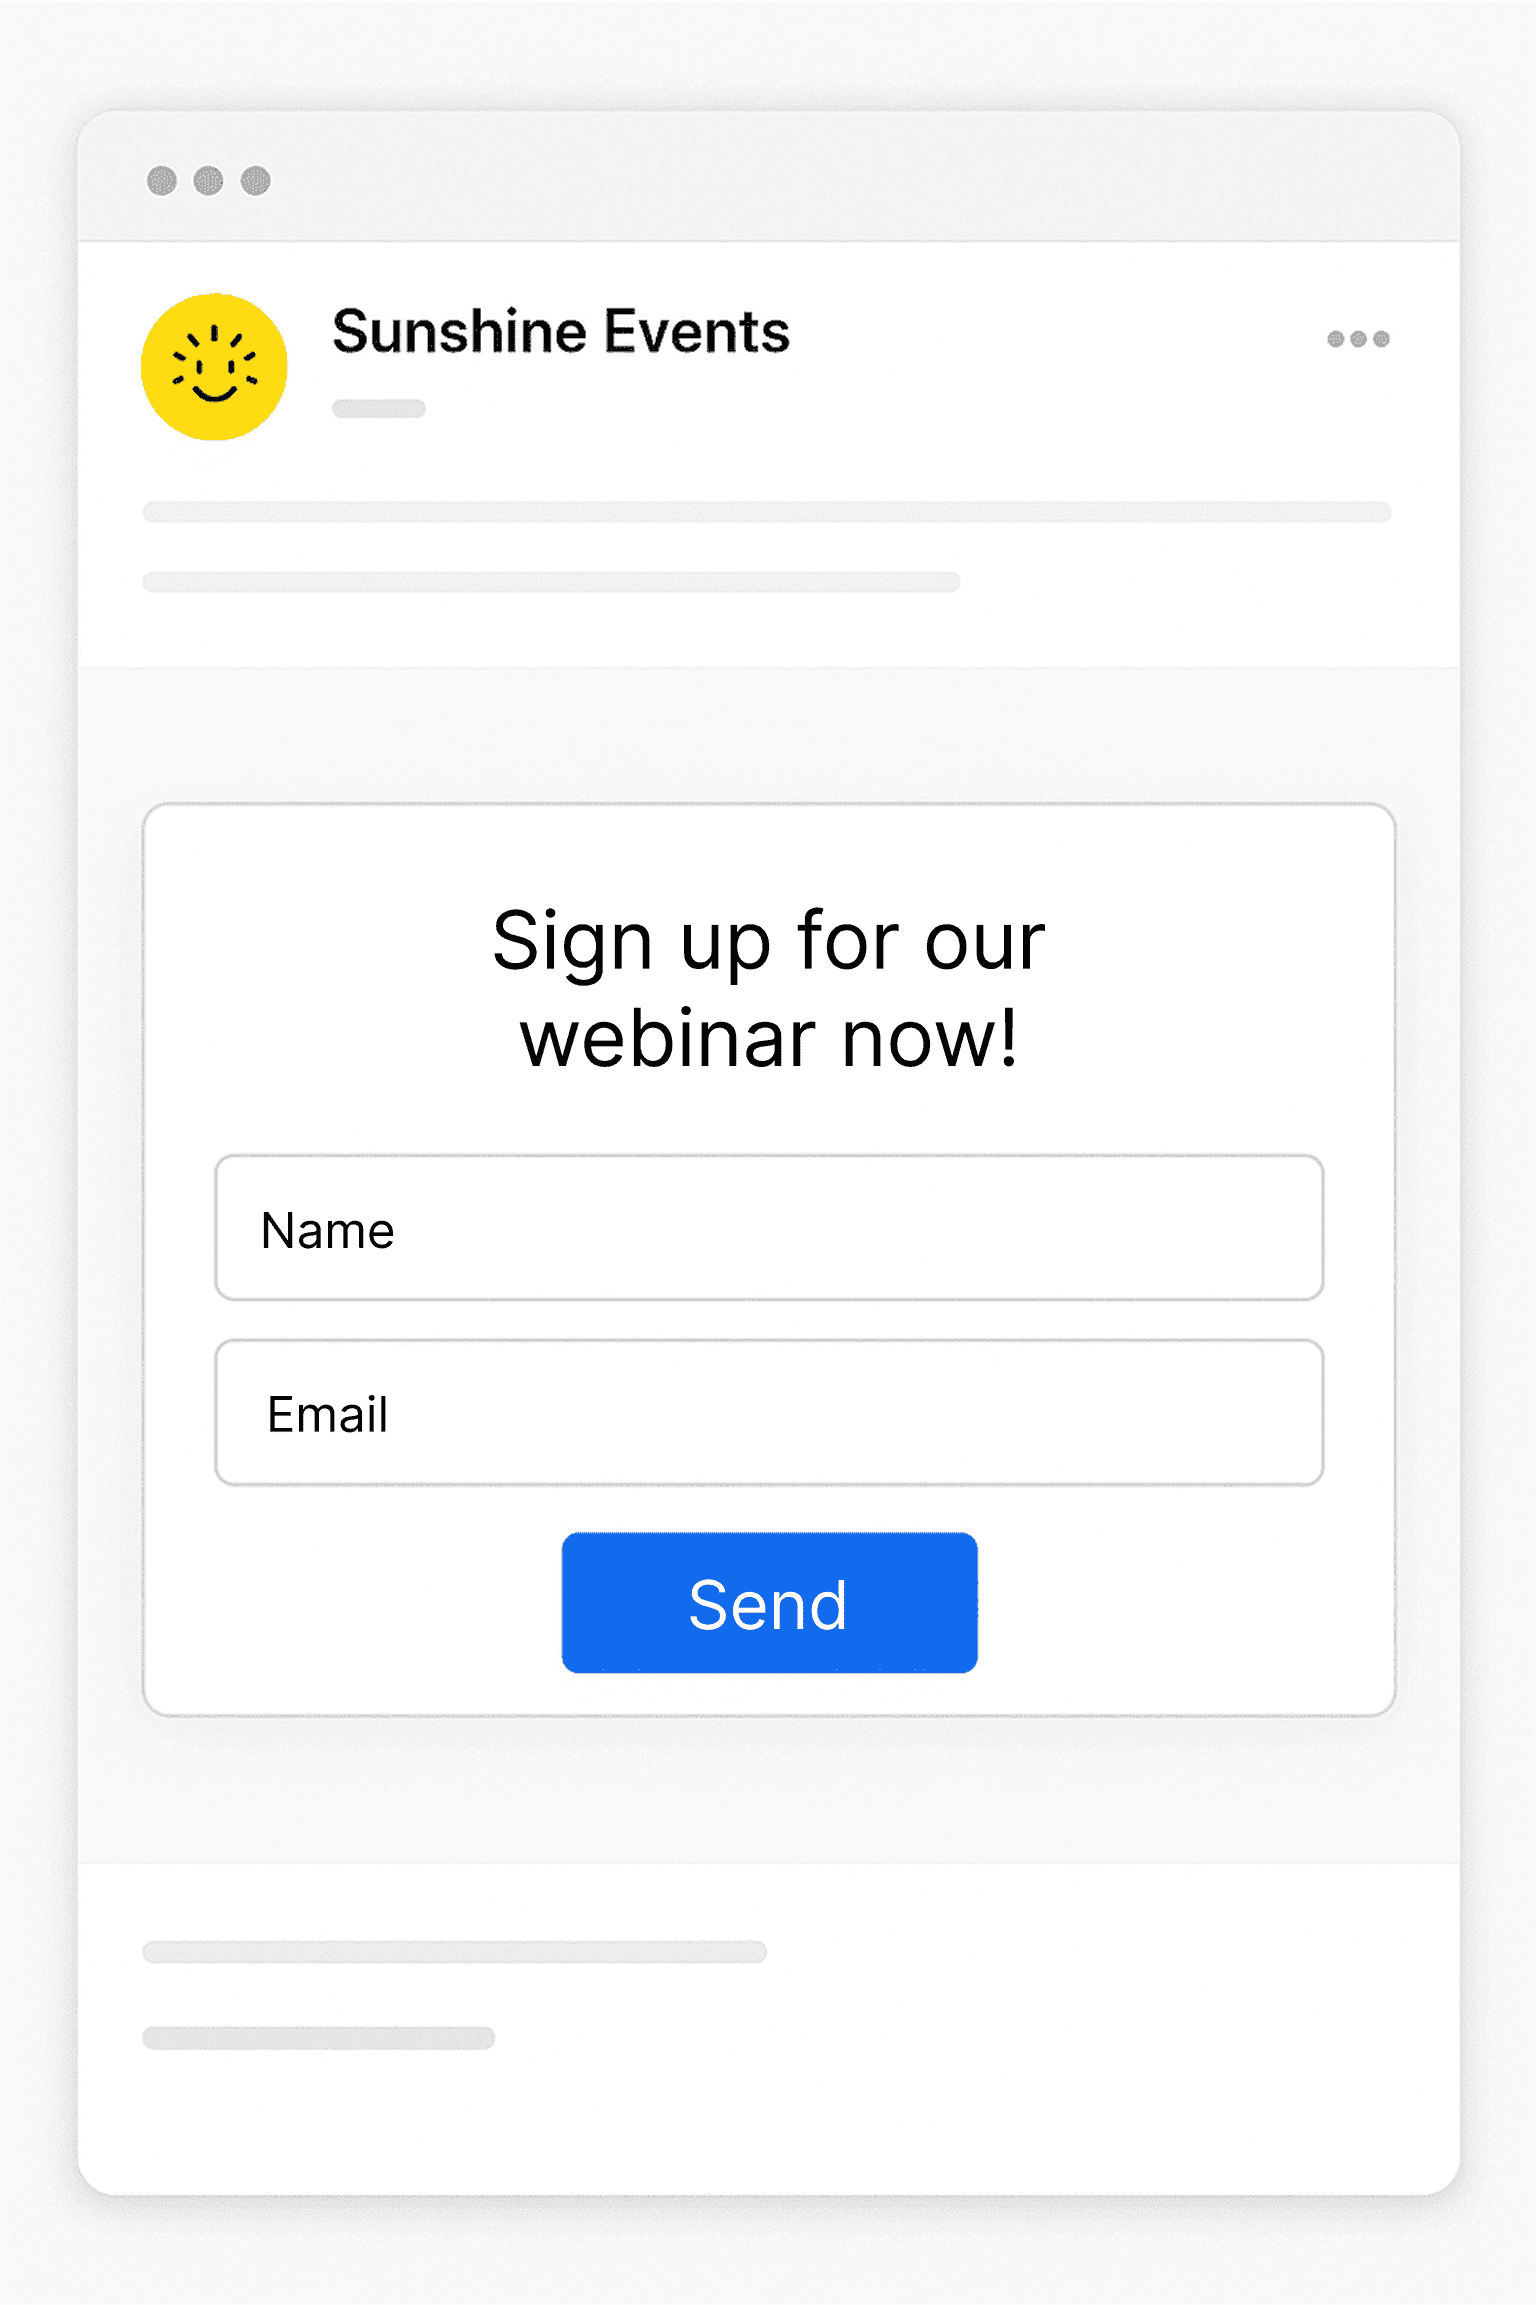 An example of a form in an email created with AMP-form
AMP-form Syntax
The markup for a basic AMP form looks like this:
1 2 3 4 5 6 7 8 9 10 11 12 13<form method="post" action-xhr="https://example.com/submit"> <input type="text" name="name" placeholder="Your name" required> <input type="email" name="email" placeholder="Your email" required> <button type="submit">Submit</button> <div submit-success> <template type="amp-mustache"> Thank you for your submission, {{name}}! </template> </div> <div submit-error> Error: please try again. </div> </form>
The main attributes here are:
- action-xhr: specifies the URL for submitting the form data;
- div submit-success: element displayed upon successful form submission;
- div submit-error: element displayed if there is an error during form submission;
For dynamic response rendering, amp-mustache is used.
Form Usage Examples
Event and Webinar Registration
With AMP-form, you can create a registration form that appears directly in the email. The user enters their name and organization, clicks the Register button, and their data is instantly sent to the organizer’s server.

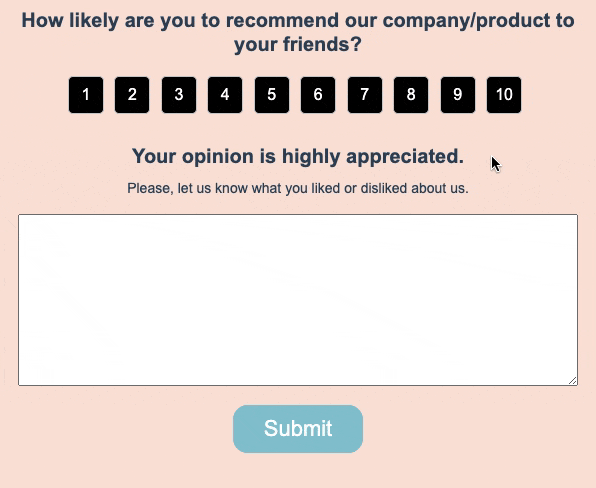
Surveys and Feedback Collection
You can embed a form with one or more questions directly in the email to instantly collect feedback, NPS, or suggestions. This form can be styled as a text input field or as a star rating scale.
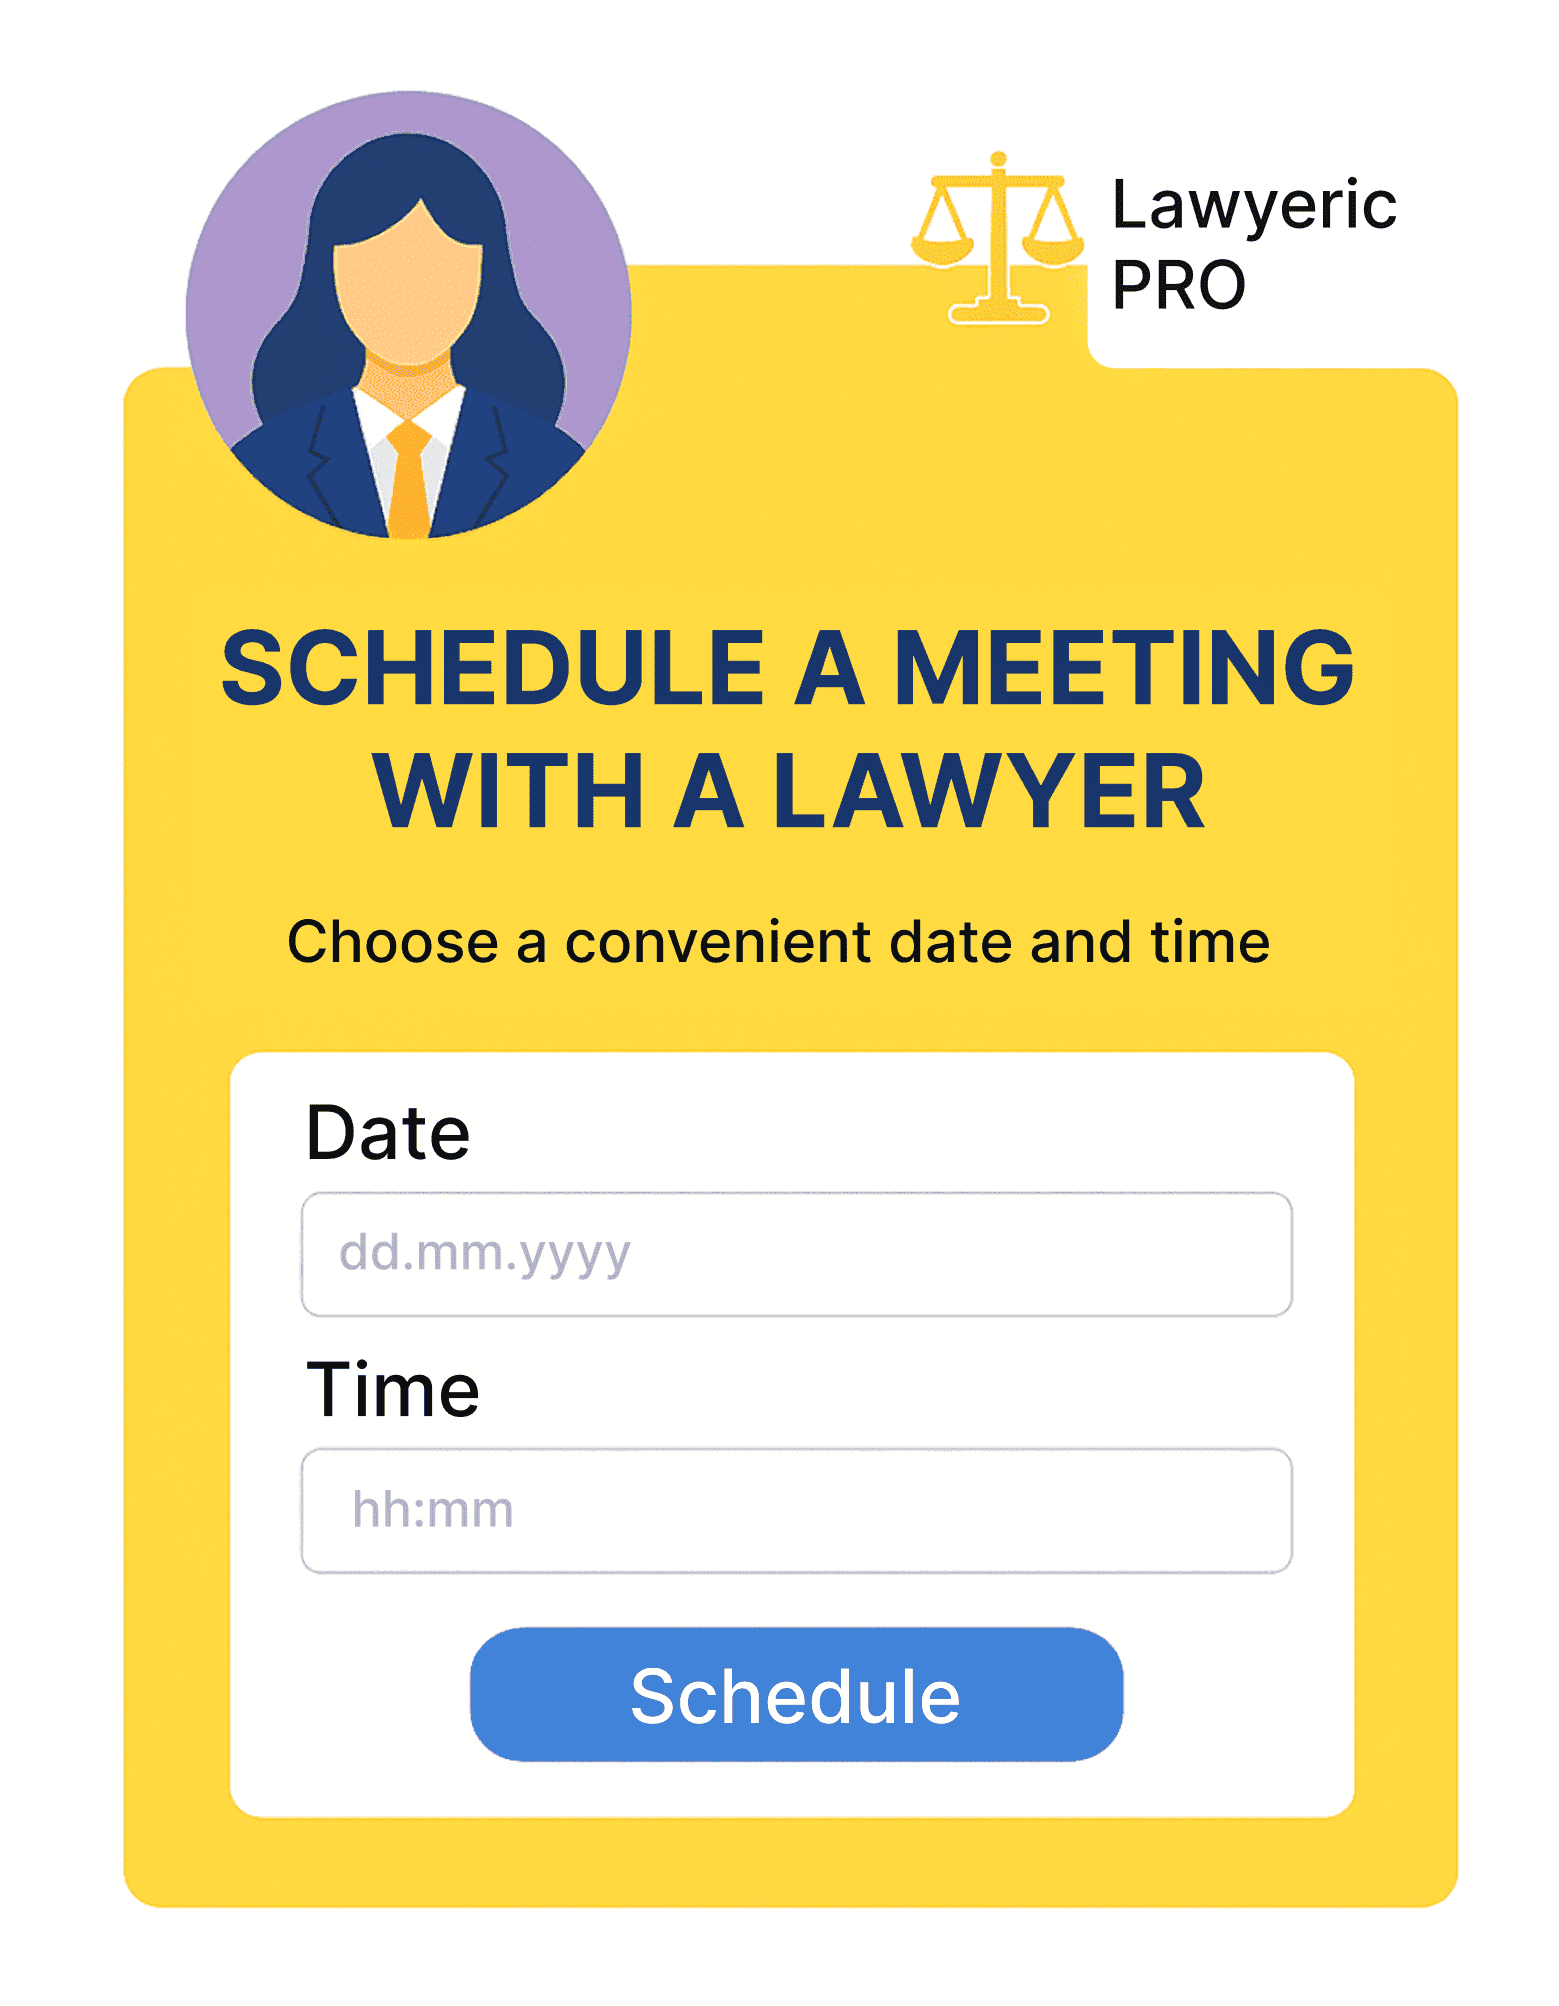
Booking Meetings and Consultations
With AMP-form, a client can select a date and exact time for a meeting, as well as leave their contact information — all directly within the email.
Placing Orders and Requests
The email recipient can place a product order or request a service without leaving the email or visiting a website.
Expanding Communication Channels
If your client already receives notifications via email, you can also subscribe them to other channels, such as SMS.

Collecting Additional Information
Forms can be used to collect any marketing-relevant information about the user — for example, their clothing size, pet details, area of work, and more. This data can later be used for personalized newsletters and offers.

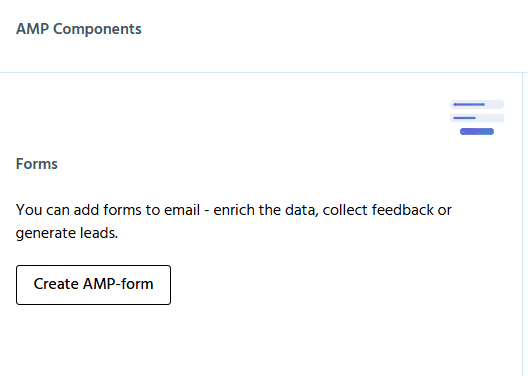
Implementation in Pixcraft
You can quickly create and configure an AMP form using the Pixcraft visual builder. To do this, go to the AMP Components section on the main page of the platform and click Create AMP-form.
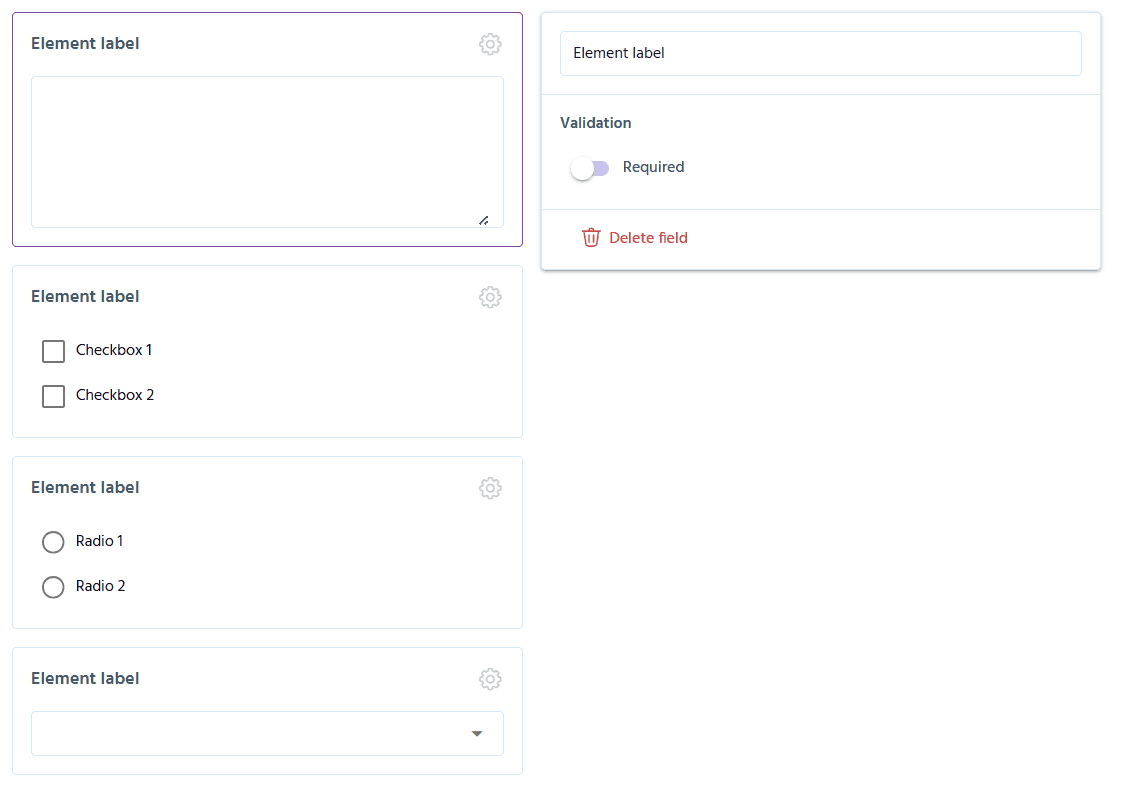
Give your form a name and add a description. If needed, choose a form template, such as a rating scale or a simple form with text fields. You can later add more components to the template.
Next, add and arrange the form elements in the desired order. The following elements are available:
Input — single-line text input field;
Checkbox — checkboxes for selecting multiple options;
Radio — radio buttons for selecting a single option;
Textarea — multi-line text input field;
Select – dropdown list for choosing a single option from the available ones;
You can also add a success message that will appear after the form is submitted.
For text fields, you can configure validation options:
Not Validate — do not validate the value;
Required — field is required;
Equal to value — field content must exactly match a specific value (to be entered in the prompt field);
Phone — validates the number of numeric characters; the required count should be set in the additional validation field;
Email — the entered value must match the email address format.
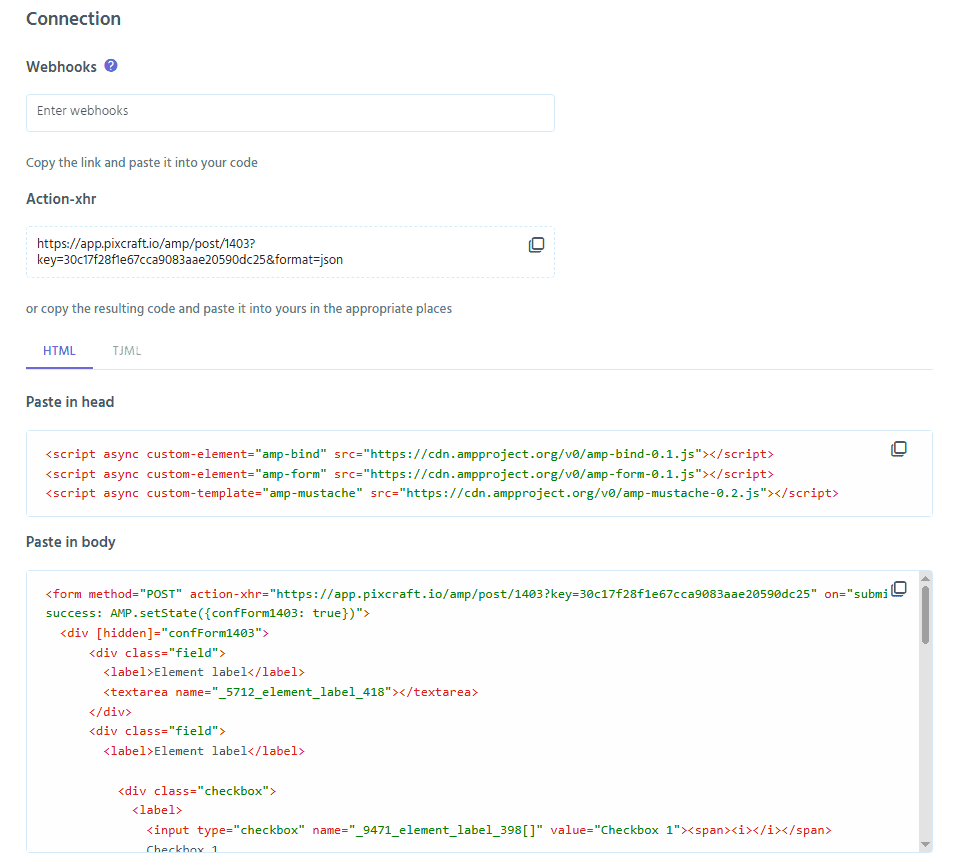
By default, form data is stored in Pixcraft, but if you need to send it to an external service or database, you can add a Webhook URL. To do this, enter the redirect URL in the corresponding field, and Pixcraft will start sending POST requests to the specified address. The request includes the following parameters:
| Parameter | Type | Example | Description |
|---|---|---|---|
| componentId | Number | 123 | ID of the component in Pixcraft. |
| campaignId | Number | 124 | ID of the campaign the component belongs to. Can be left empty if the component is not linked to any campaign. |
| String | test@test.com | Email address of the subscriber who submitted the form. | |
| date | UNIX date | 1648553051 | Time when the event occurred. |
| owner | Number | 125 | ID of the form owner in Pixcraft. |
| data | Content-Type: application/x-www-form-urlencoded | {"field0": "testInput", "field1": "radio1", "field2": "checkbox2", "success": "success"} | Form data. |
For more information on creating a form and configuring a webhook, see the Pixcraft documentation.
The form is ready. Copy the generated code and paste it into your email template.
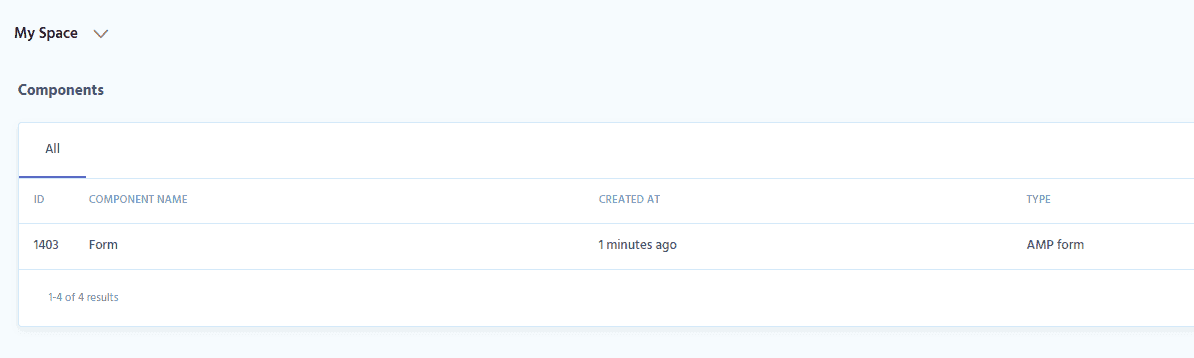
After saving, the form will be available in the Components section.
The data collected through the forms will be stored in Pixcraft. In the Statistics section, you will find information about all interactions with the form.

This information can be exported as a CSV file or uploaded to Google Sheets.
Zapier integration
Form data can be automatically sent to external services using webhooks and tools like Zapier. This enables seamless integration of emails with any service without writing additional code or complex programming.
To begin, click Create Zap in the left-hand menu.
In the Trigger field, select Webhook. On the right, in the menu that appears, choose Event — Catch Hook.
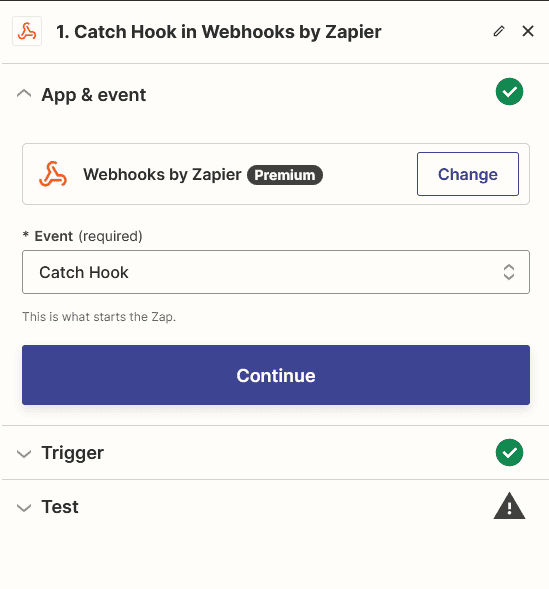
Click Continue here and in the Trigger section that follows.
The service will generate a webhook URL, which must be specified in the form settings in Pixcraft.
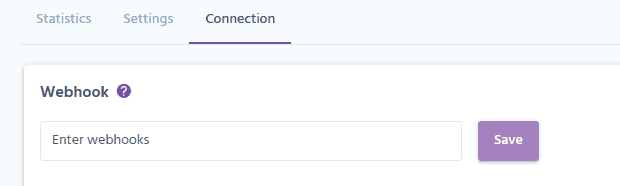
Paste the URL and click Save.
Return to Zapier and click Test Trigger. Now you need to submit the form to trigger the request.
To do this, insert the form code into your email or use Google’s AMP playground.
After submitting the form, go back to Zapier, click Test Trigger, and you’ll see a list of received fields.
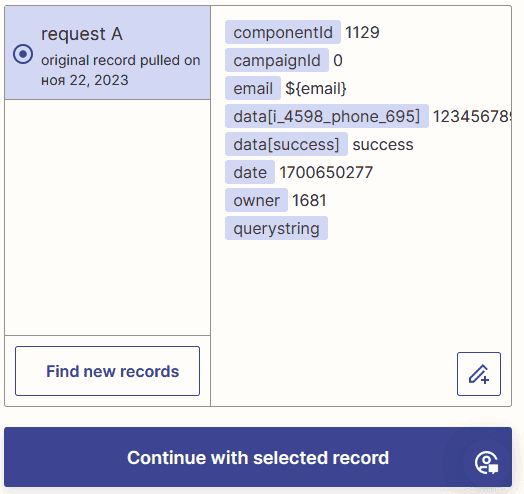
Click Continue with selected record.
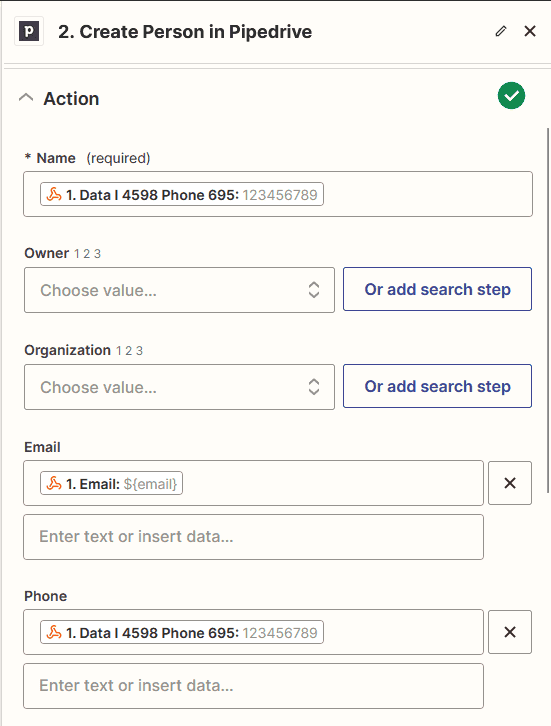
Next, decide what to do with the received data: send it to an ESP, CDP, CRM, etc. — select any integration from the list. For example, to send the data to Pipedrive, select Pipedrive in the Action field.
For Event, choose Create Person. Click Continue, then add or select your Pipedrive account.
In the Action section, map the submitted fields accordingly.
Click Continue, then Test step.
Finally, just publish the integration by clicking Publish.
Conclusion
By using AMP forms, you save your clients time — they don’t need to open a browser or wait for a separate page to load. This greatly simplifies data collection and significantly boosts audience loyalty and engagement.
And if you're creating forms with the Pixcraft visual builder, you won’t have to deal with the specifics of AMP-form syntax. Instead, you can spend that time crafting more creative marketing campaigns for your company.