Stable Diffusion: How to Deploy an AI Image Generator on Your Computer
Cloud-based AI image generators like Midjourney or DALL-E have already become widely-used tools. They are designed for ease of use, creating illustrations based on text prompts in just a few seconds. Their operation is simplified, but customization options are limited.
However, there is an alternative solution: Stable Diffusion, a flexible tool that you can deploy on your own computer and configure it to suit your needs. In this article, we will take a look at how Stable Diffusion works, what you need to pay attention to during installation, and how to achieve relevant, high-quality results.
What is Stable Diffusion
Stable Diffusion is AI-based software that generates images using diffusion processes. Its architecture allows for creating illustrations in a wide variety of styles, from cartoonish to photorealistic.
But how does it differ from Midjourney or DALL-E? And is it really worth trying? Here’s what makes Stable Diffusion stand out:
Freedom and flexibility. Stable Diffusion gives you full control over the image generation process. You can choose among different checkpoints (generation models), experiment with sampling algorithms, and fine-tune the style and quality of images.
Distributed free of charge. Stable Diffusion is an open-source project. Unlike cloud solutions, you don’t have to wait in a server queue or pay for a subscription. The only potential limitation is the hardware requirements.
Less copyright restrictions. Cloud services often impose restrictions on commercial use or editing of generated images. Many Stable Diffusion models don’t have such constraints, so you are free to use the generated illustrations, provided you comply with the license terms of the specific model.
How Does the Image Generation Work
To put it simply, Stable Diffusion creates a random set of pixels and gradually “cleans” the noise, eventually turning them into an image. Here is how it works:
1. First, it generates “noise” that serves as the starting point for the process.
2. Then the noise is “cleaned” step by step. Colors, shapes, and recognizable objects begin to appear.
3. With each following step, the generated image aligns more precisely with the description.
 Image generation steps for the “Cat on a sofa, white and gray fur” prompt
Image generation algorithm includes several key components:
Text Encoder. Converts text prompt into an embedding (a numeric array). The embedding serves as a code that tells the software what exactly needs to be generated.
U-Net. The main component responsible for iterative “denoising.” At each step, it assesses the current version of the image and determines how it should be adjusted to better match the prompt.
VAE (Variational Autoencoder). Converts the latent representation (a compressed, abstract “draft”) into a finished image. Different VAE versions are available for Stable Diffusion: some reproduce colors and textures better while others help generate more realistic or stylized images.
How to Deploy Stable Diffusion
Stable Diffusion requires fairly powerful hardware to run smoothly. Here are the minimum recommended specifications:
Graphics Card: at least 6GB of video memory, ideally 8GB or more (for example, NVIDIA RTX 2060, RTX 3060, or newer).
Processor: a modern multi-core CPU. Although the GPU handles most of the workload, the CPU prepares and loads models.
RAM: starting at 8–16GB. The more, the better.
Disk Space: 10–30GB free space. More is recommended to store the software, checkpoints, and the required add-ons.
Installation
The most popular and reliable interface for running Stable Diffusion is the AUTOMATIC1111 Web UI. It allows users to generate images directly in the browser via a user-friendly web interface.
To run it properly, first you need to install Python and git. After that, download the current version of AUTOMATIC1111 from the official GitHub repository and follow the step-by-step installation guide in the project documentation.
For Users with AMD Graphics Cards
Owners of AMD graphics cards may encounter difficulties running Stable Diffusion since by default its models are optimized for CUDA (a parallel computing technology by NVIDIA). Although AMD offers an equivalent called ROCm, its official support is limited.
Still, it is possible to deploy AUTOMATIC1111 on PCs with AMD graphics cards. The simplest and most convenient way would be to use the AMUSE application. This is a graphical launcher for Windows PCs that supports various models and offers extensive settings and parameters (in professional mode).
How to Generate Images Based on Descriptions
The core mode of Stable Diffusion is text2img. Here, the user provides a description and sets the desired parameters, after which the model processes the prompt and generates an image. Below are some of the key settings that influence the generation process:
Prompt. Text description that Stable Diffusion follows when creating the image. Prompts must be in English. The best option is to use keywords and short, simple phrases while avoiding long, adjective-heavy sentences.
Negative Prompt. Describes what Stable Diffusion should avoid when generating an image. Same rules apply here as well: for better results, use keywords or short phrases in English.
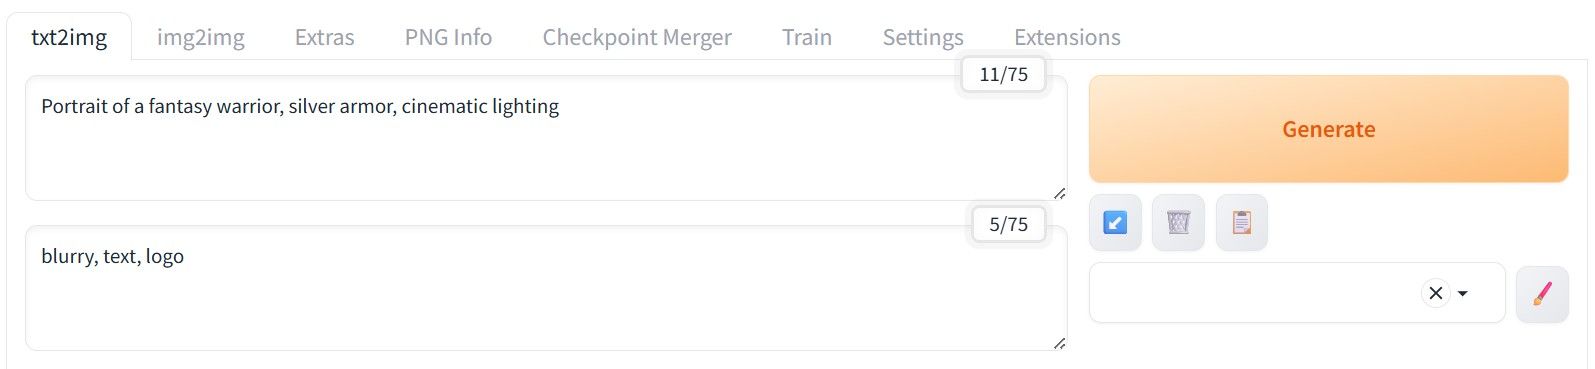 Prompt (top) and Negative Prompt (bottom) examples in AUTOMATIC1111
- Sampling Method (Sampler). Algorithm that manages the step-by-step transformation of noise into an actual image. Sampler may affect style, details, generation speed, and the number of steps needed for the required outcome.
Popular options include:
1. Euler a. Fast and versatile, suitable for a small number of steps (20–30).
2. DPM++ 2M. Offers good details and stability, works well with higher step counts (30–50).
3. Heun. Experimental method. Slower, but sometimes produces unique textures and styles.
4. DDIM. Fast option to create smoother details, especially effective within the range of 25–50 steps.
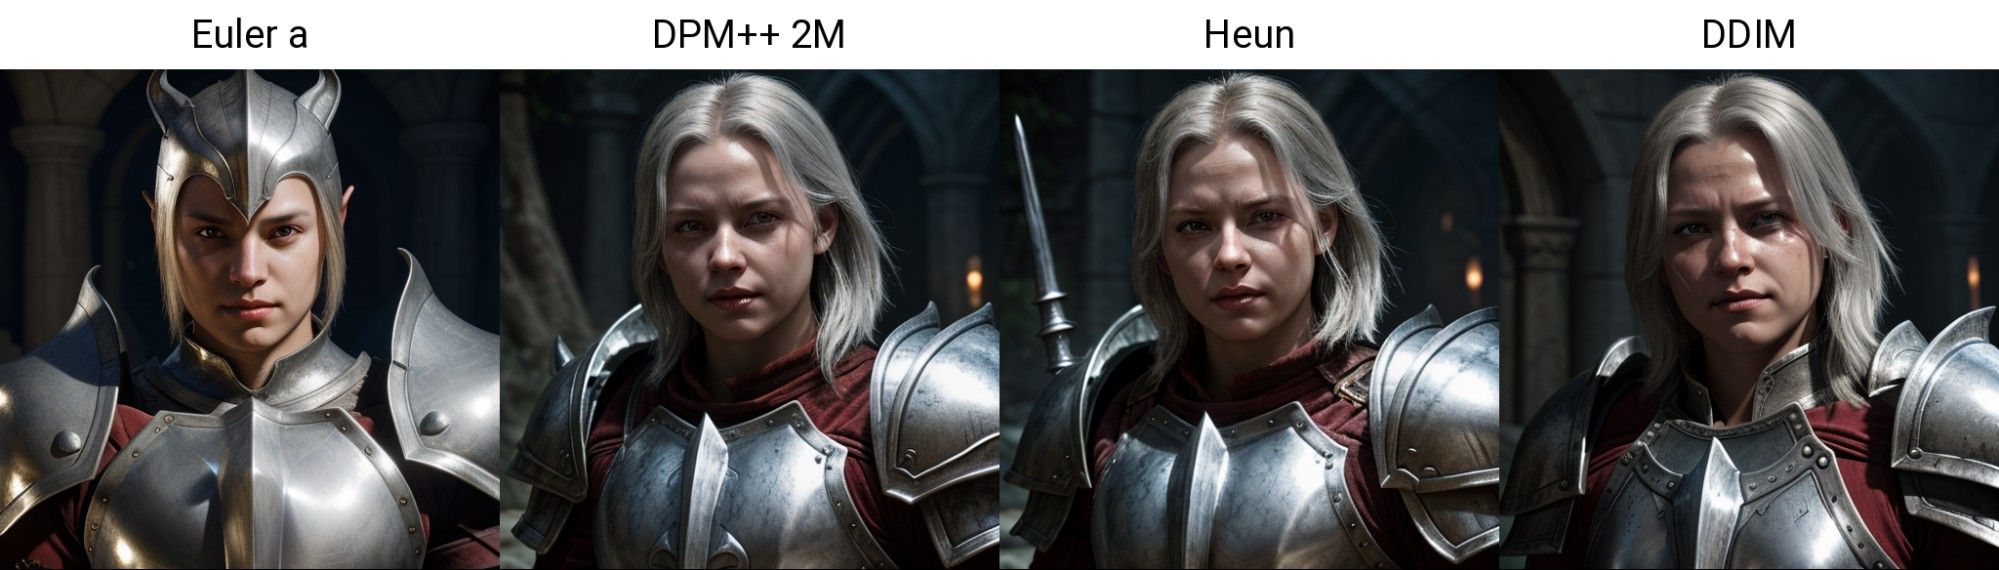 Images generated by different samplers for the “Portrait of a fantasy warrior, silver armor, cinematic lighting” prompt
More samplers are available in the interface. Try different options to find which of them suit you best.
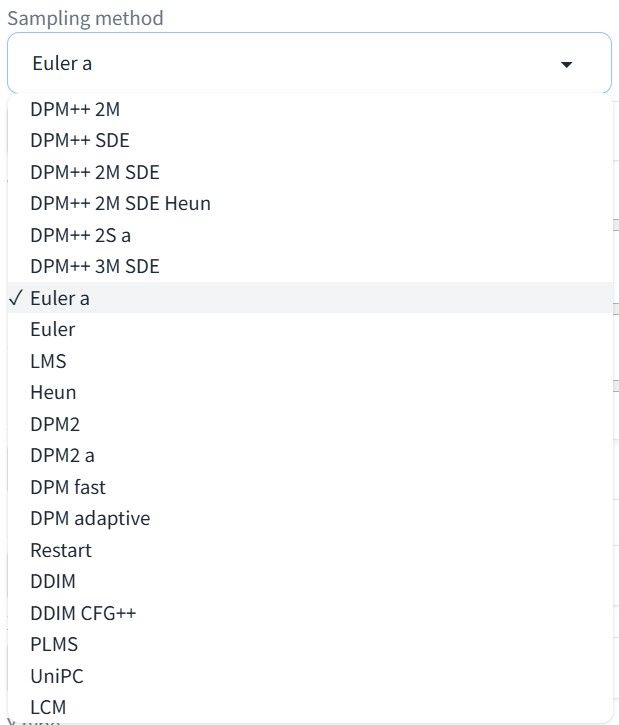 A drop-down list of samplers
- Sampling Steps. The number of steps Stable Diffusion takes to create an image. More steps yield higher accuracy but longer generation time.
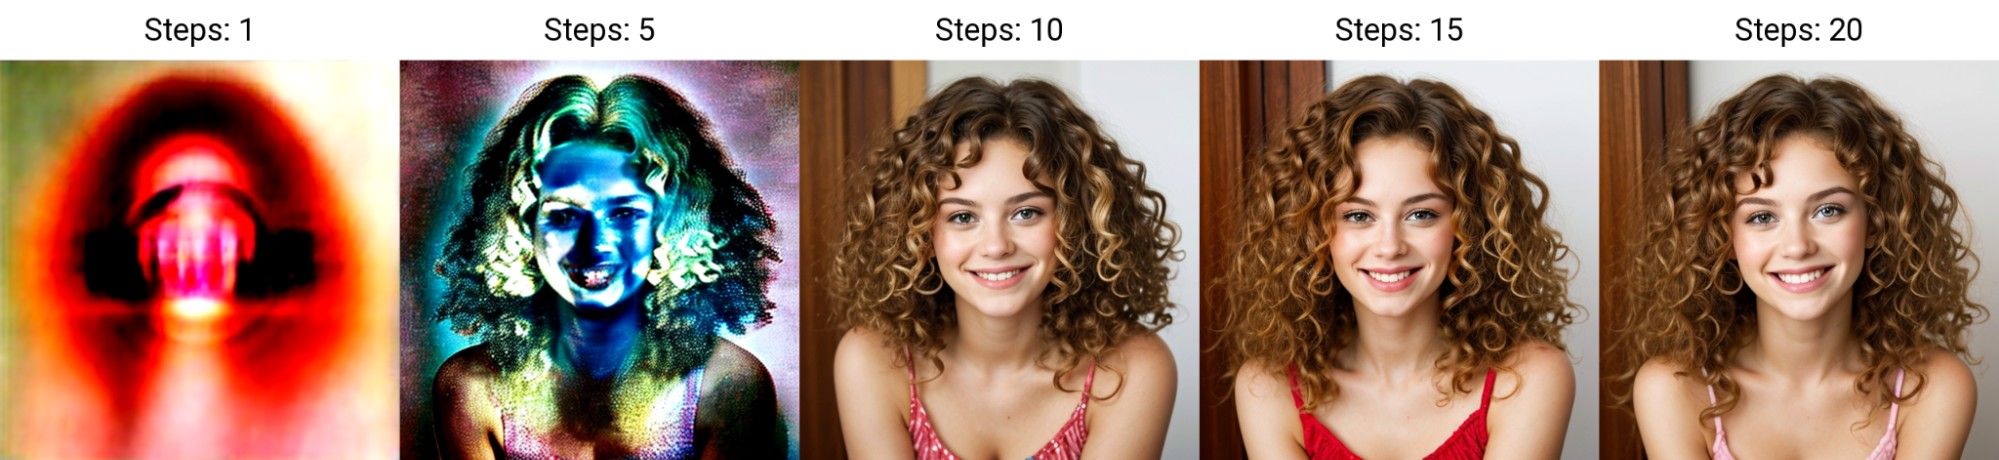 Image generation results at different steps for the “Woman, curly hair, smiles at camera” prompt
- CFG Scale. Controls how strictly the model adheres to the prompt. For instance, low values (1–3) lead to loose interpretation and may bring abstract results. Medium values (7–9) offer a more balanced outcome. High values (12+) provide maximum adherence but may cause artifacts and unnatural details.
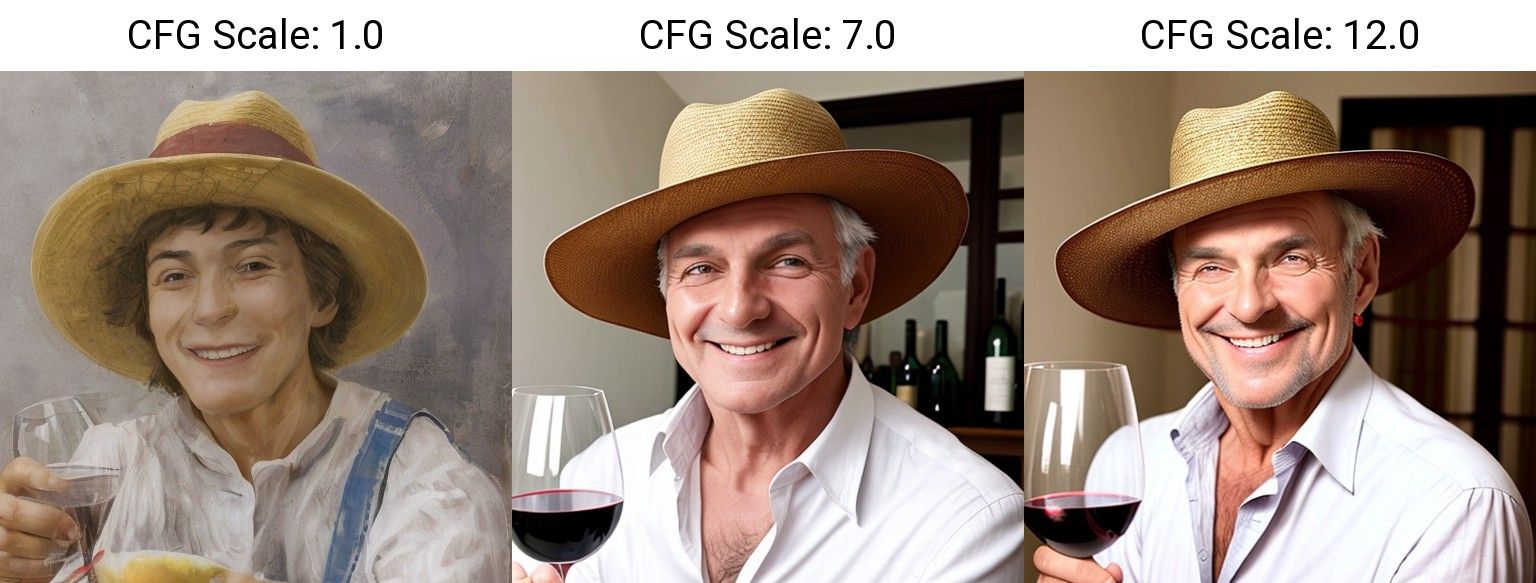 Different CFG values for the “Man in a hat, smiling, wine glass in right hand” prompt
Width / Height. The resolution of the output image in pixels. For optimal quality, it’s better to adhere to the resolution which the model was trained on. For example, the default resolution for Stable Diffusion 1.4 / 1.5 stands at 512×512.
Seed. A number that determines the starting point from which the image is generated. When it’s set to -1, each result will be unique. Yet with a fixed seed and unchanged parameters, the result will be identical each time: this is useful for reproducing a specific output.
Script. Allows to use additional plugins on top of the main generation process. For example, the X/Y/Z Plot script generates a grid of images with varying parameters (steps, samplers, checkpoints, etc.). This makes it easy to compare how different settings affect the output with the same prompt.
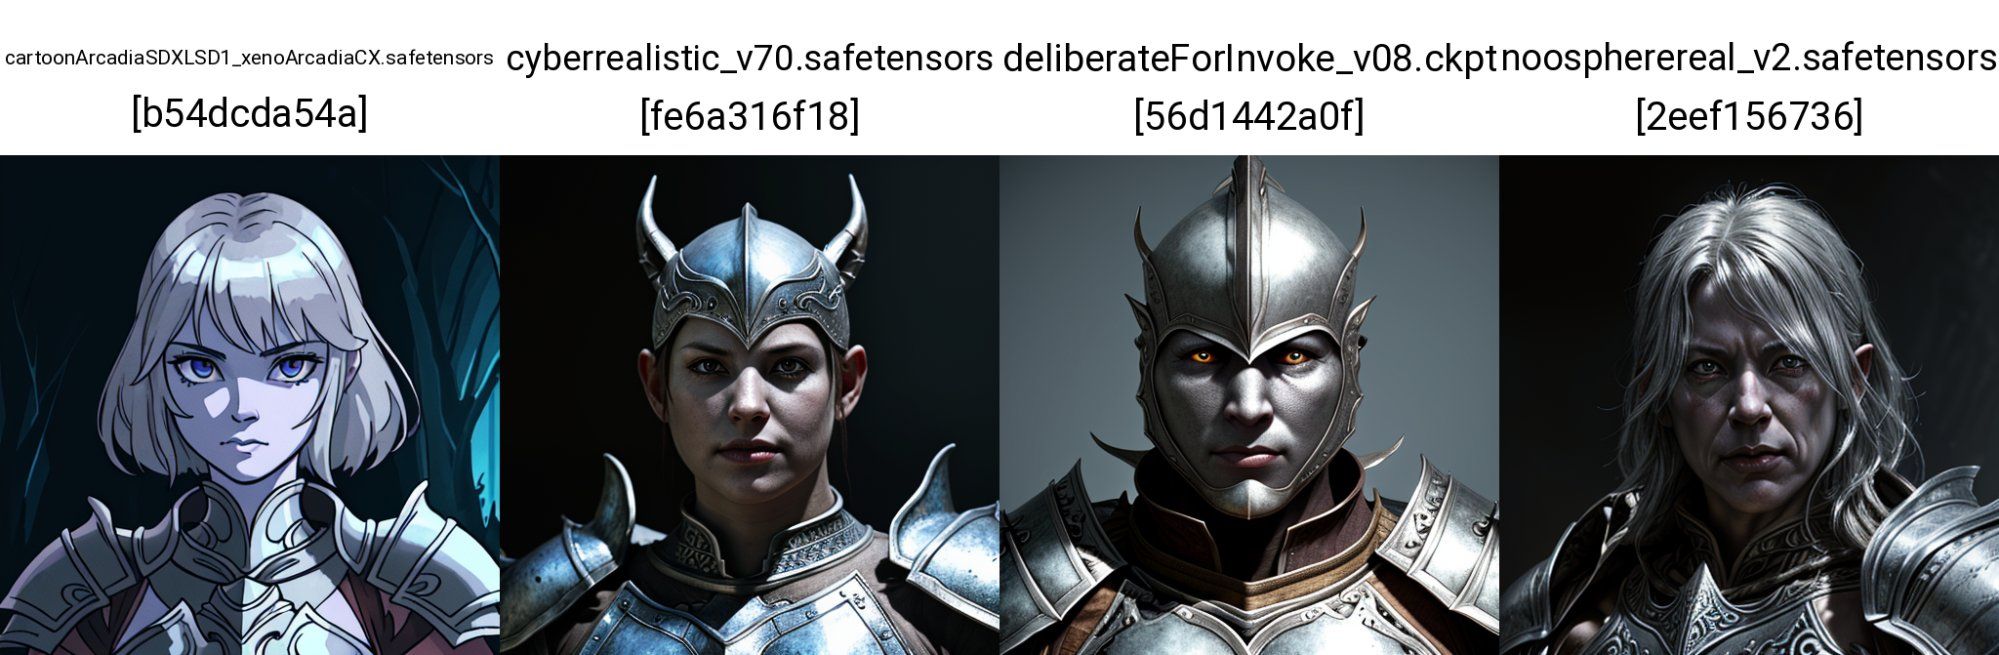 Image grid showcasing how different checkpoints handled the “Portrait of a fantasy warrior, silver armor, cinematic lighting” prompt
Tips for Achieving High-Quality Results
Below are basic recommendations to optimize the image generation process.
Start with the following values: Steps ≈ 16 and CFG = 7. This ensures quick generation with reasonable accuracy and good prompt adherence. Note that parameter combinations are individual for each case. It’s recommended to experiment with different samplers and checkpoints to find the best balance of quality and rendering time.
If the output doesn’t meet your expectations, try other Sampling Methods. Different samplers handle the same prompt differently.
If there are deformations or unwanted elements in the image, try using Negative Prompts. Note that accurate result is not 100% guaranteed, especially with vague or abstract prompts.
For high-resolution images (1024×1024 and above), 20–30 steps are usually enough. Higher counts significantly increase rendering time and may cause errors.
Alternatively, generate images at their native resolution and upscale them as described below.
How to Increase Image Size in Stable Diffusion
It’s possible to set the generated image size manually, yet large deviations from native resolution may negatively impact the outcome. In this case, the better option is to use upscalers: they enlarge images while minimizing quality loss.
Here’s how they work: first, the illustration is generated at the native resolution. Next, the upscaler enlarges it and restores details. This approach makes it easier to create images suitable for printing, large layouts, or high-detail retouching.
In the AUTOMATIC1111 interface, upscaling works like this:
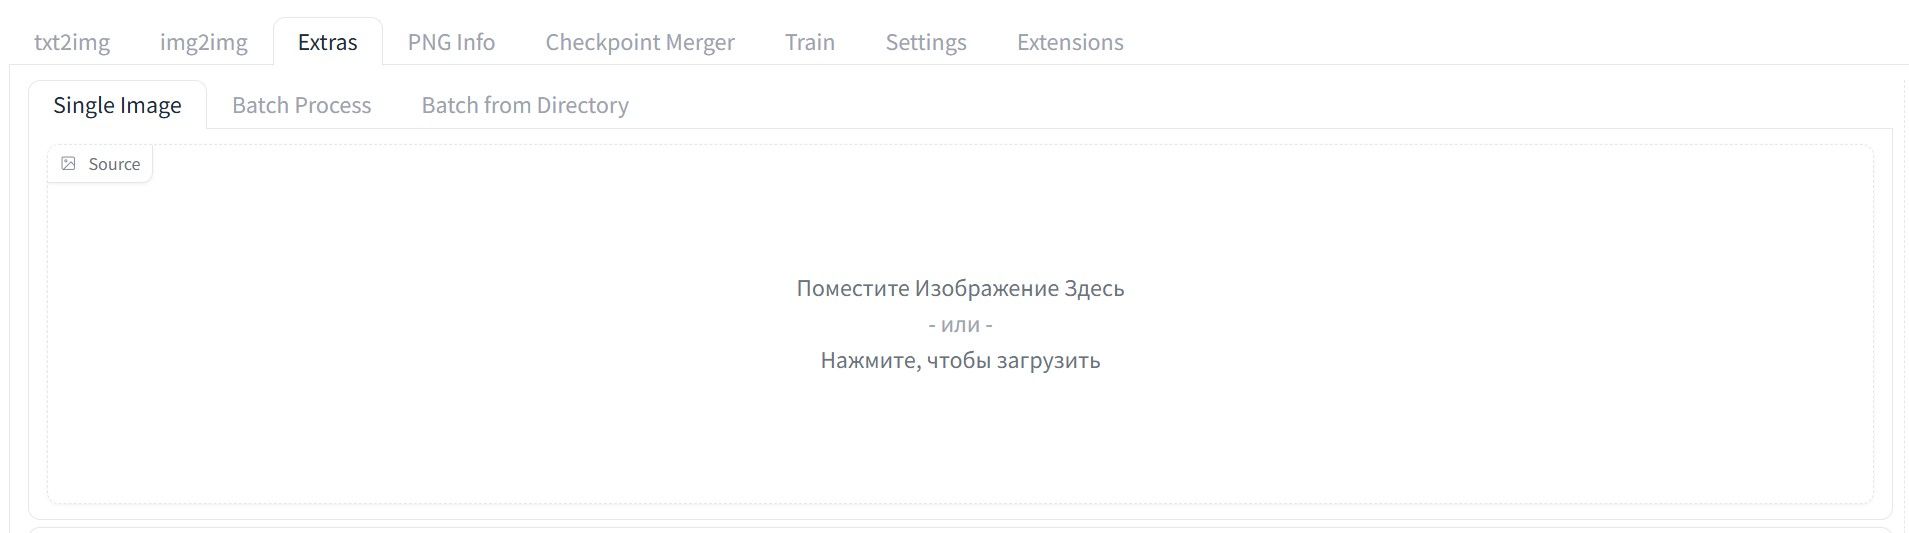
- Upload the image. Go to the Extras tab and either drag the generated image into the dedicated field or click on the field and select the image from a folder.
- Choose an upscaler. Some of those are available by default, but you can install more if needed. This lets you choose the optimal algorithm for your goals, from minor scaling to deep texture restoration.
Notable upscalers include:
1. Lanczos. Simple and fast, good for small scaling (1.5x or 2x). The downside is, it doesn’t restore details but simply enlarges the image.
2. R-ESRGAN. Neural network upscaler that restores fine details and textures, including in photorealistic images.
3. LDSR. Enlarges the image while adding missing details. Useful for stylized or complex illustrations but relatively slow.
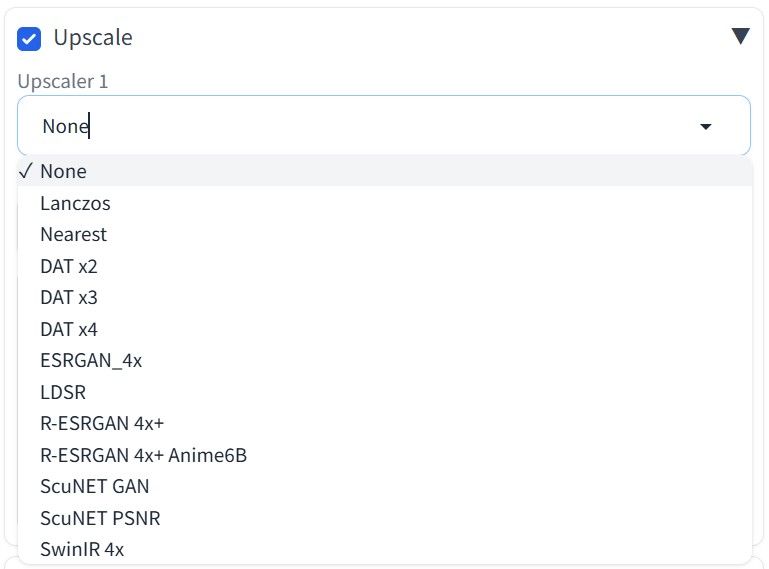 Upscalers list example in AUTOMATIC1111
- Set the scaling factor. Specify the desired scale (e.g., 2x or 4x) and hit the “Generate” button to receive a higher-resolution image ready for further processing.
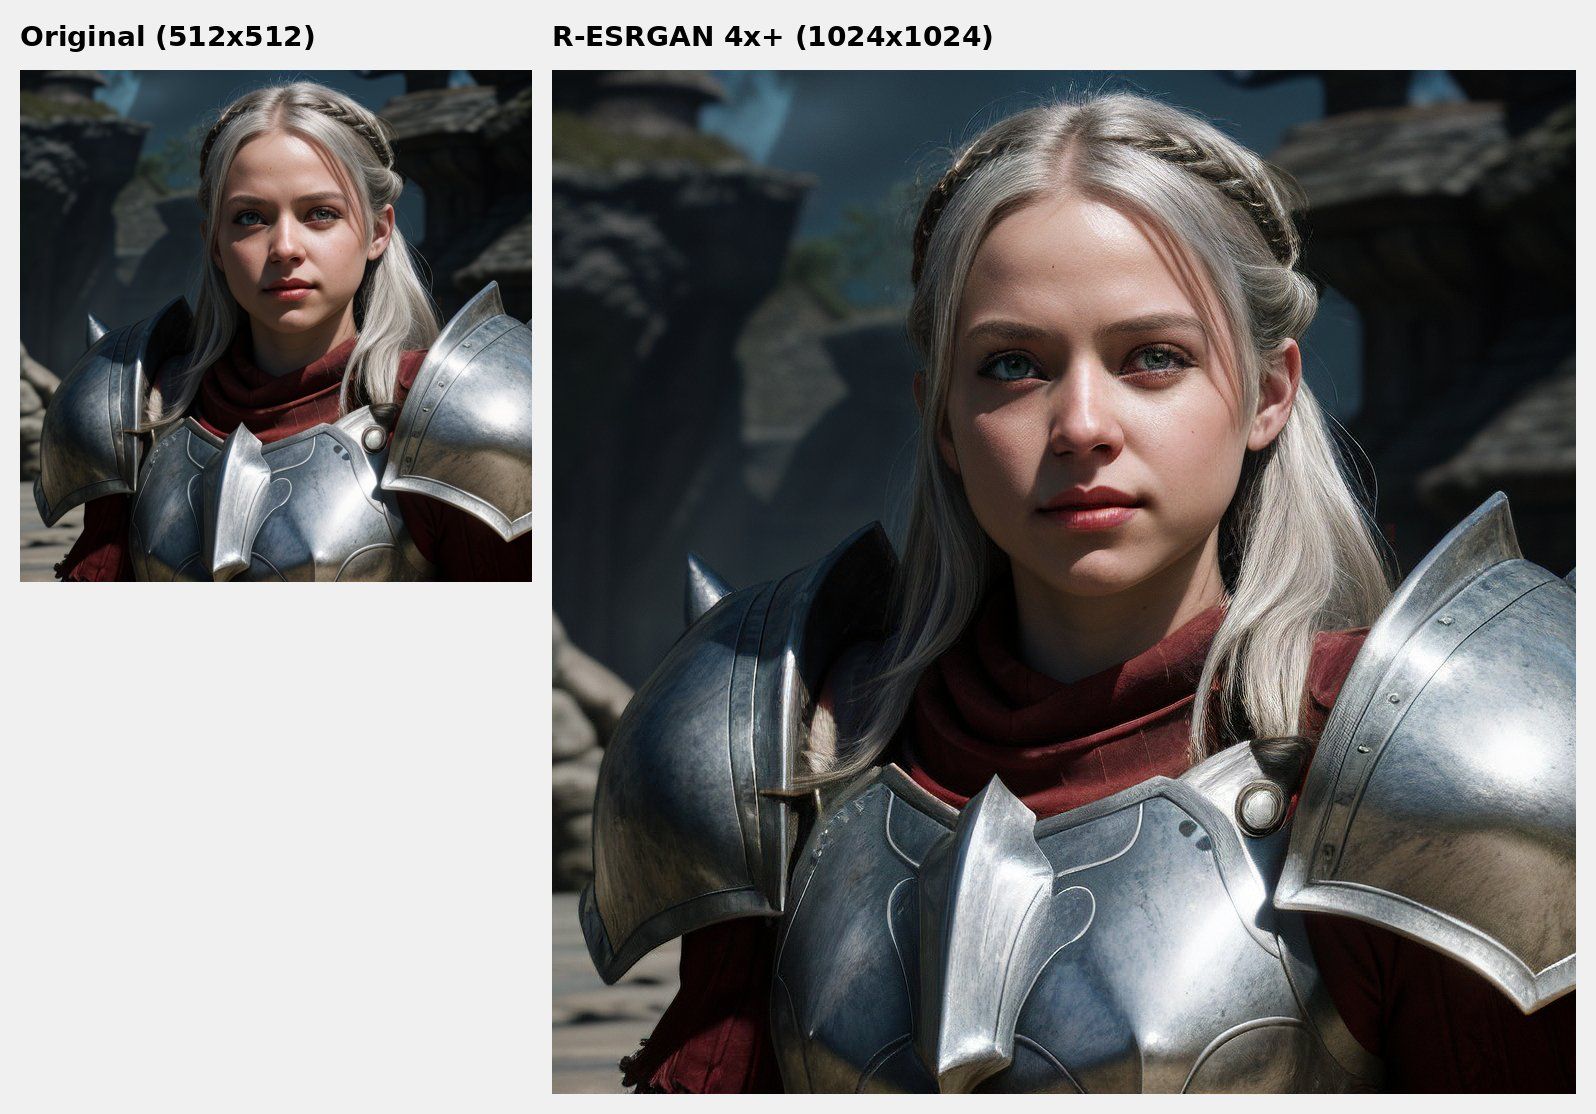 Example of a 2x image scaling by R-ESRGAN 4x+
And if installing and configuring AUTOMATIC1111 or Amuse sounds like a hassle, try generating images directly in the Pixcraft editor. To do this, drag the Image primitive onto the canvas, hit the Click to upload button, and select AI.
Simply describe the image you want to generate, set its proportions, and optionally choose a desired style from the list. Within a few seconds, the result will be ready for adding to the email template. It’s faster and more convenient than setting up Stable Diffusion manually.
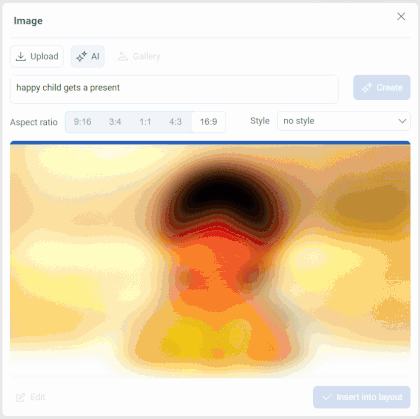 Image generation in Pixcraft
Conclusion
While Stable Diffusion requires considerable resources and attention to detail, it offers far more possibilities than cloud services. If you invest some time in setup and testing, you will get not just an AI generator but a fully customizable tool for a wide range of tasks.
Try different checkpoints and samplers, adjust every parameter, and assess the results. All this will help you master the tool faster and unlock the full potential of Stable Diffusion.