AMP-forward-link: How to Confirm Actions Directly in the Email Client
The classic email confirmation scenario works like this: the user clicks a button and lands on a website, where the action result is recorded. But what if extra steps such as redirects and page loading were removed, and instead the recipient could complete actions directly inside the email?
For this purpose, Pixcraft provides a special component: AMP-forward-link. In this article, we will take a closer look at what this component is, how it works, and how you can add it to your campaigns.
What Is AMP-forward-link
This AMP component brings the entire confirmation process inside the email itself. The button acts without redirecting the user or opening new tabs: basically, the email recipient submits a form, after which the server handles the processing in the background.
Thus, action confirmation in an email becomes:
- More convenient — quick response is ensured, unnecessary clicks are eliminated, and there is no need to visit an external website.
- More reliable — the risk of losing the reader’s attention on intermediate steps is reduced to a minimum.
Practical Use Cases
Let’s take a look at three basic ways to use AMP-forward-link that will help you get the most out of this component.
Subscription Confirmation (Double Opt-In)
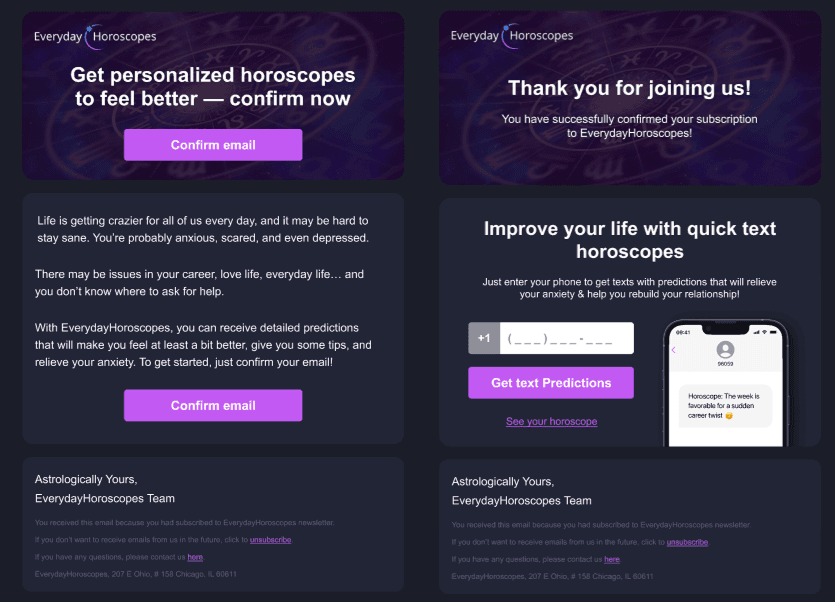
A typical scenario where AMP-forward-link becomes especially useful. The recipient opens the email and clicks the confirmation button. The component registers the action and immediately displays a successful completion message (for example: “Done! Subscription activated”). From the user’s perspective, everything looks as straightforward as it gets: one click, quick response, and status update.
Collecting Additional Information
Immediately after a successful click, the email can display an extra form alongside the message. For example, it may include:
- Categories for segmentation. Here, the recipient chooses the most interesting categories of future newsletters. This way, the database is segmented by interests, and the subscriber receives relevant content from day one, which can increase open rates and reduce the risk of unsubscribing.
- Profile expansion. Subscription confirmation emails typically achieve very high OR and CTR. When the user clicks the button and confirms the subscription, their attention is already focused on the brand. At this point, the email may gently offer to share some additional information such as name, phone number, or other details.
This approach has already proven itself in practice. For example, after the email confirmation, Everyday Horoscopes asked users to provide their phone numbers. As a result, the conversion rate exceeded 40%, meaning that nearly half of subscribers agreed to share their additional contact data.
Unsubscription with Feedback Form
The mechanism works for both subscriptions and unsubscriptions. Here, the user clicks a button, after which the email displays not only a simple message (like “You have successfully unsubscribed”) but also a feedback form, for example, “Please share the reason why you decided to unsubscribe”.
This is useful because:
- You immediately receive an explanation about the decision, which becomes valuable for further analysis.
- You may offer a soft alternative right in the email. For instance, reduce the frequency of newsletters, change the topics, or keep only critical notifications. This helps to retain part of your audience.
How to Create an AMP-forward-link Component in Pixcraft
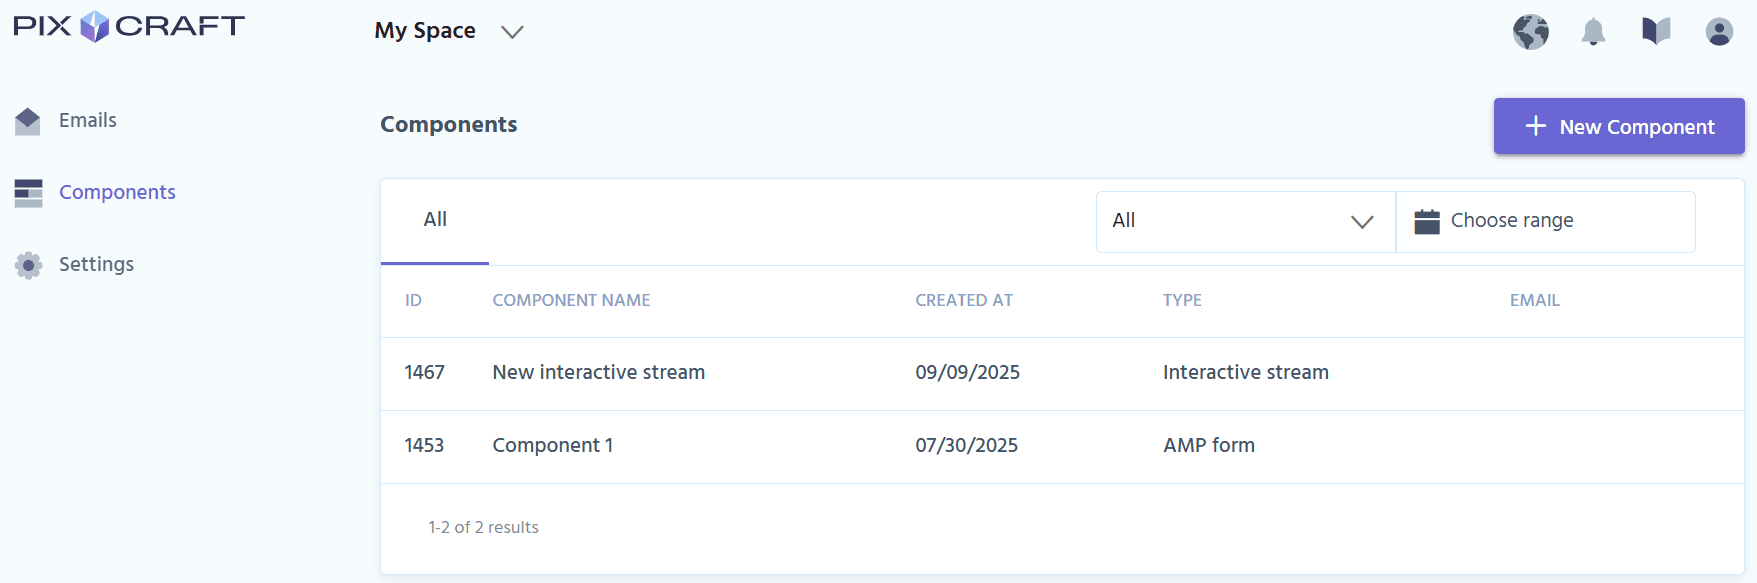
As with other AMP components, the process of creating AMP-forward-link starts with the Components menu in your profile workspace.
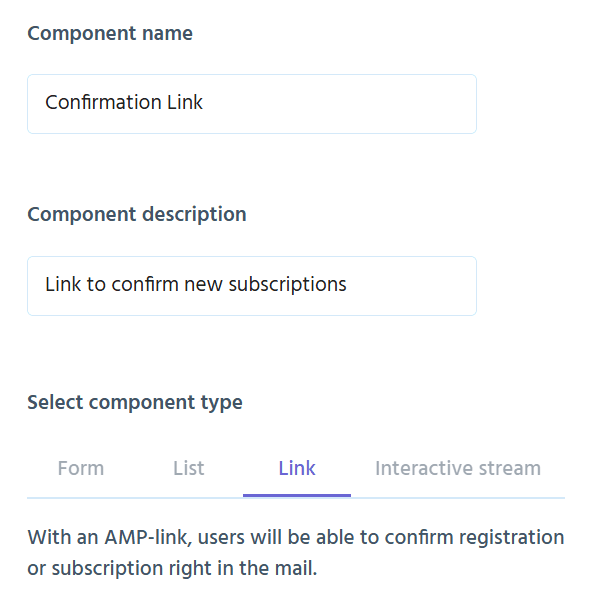
Click New Component and select Link from the list of available component types. After that, the system will ask you to fill in:
- Component name. Specify any appropriate name, for example, “Subscription Confirmation” or “Unsubscription with Feedback”. This will make the navigation easier.
- Component description. You may optionally add a brief explanation, for instance, what this component is for or the campaigns where it is used. The field can be left blank, but it may prove helpful for better understanding of usage scenarios, especially when several users are working on the projects simultaneously.
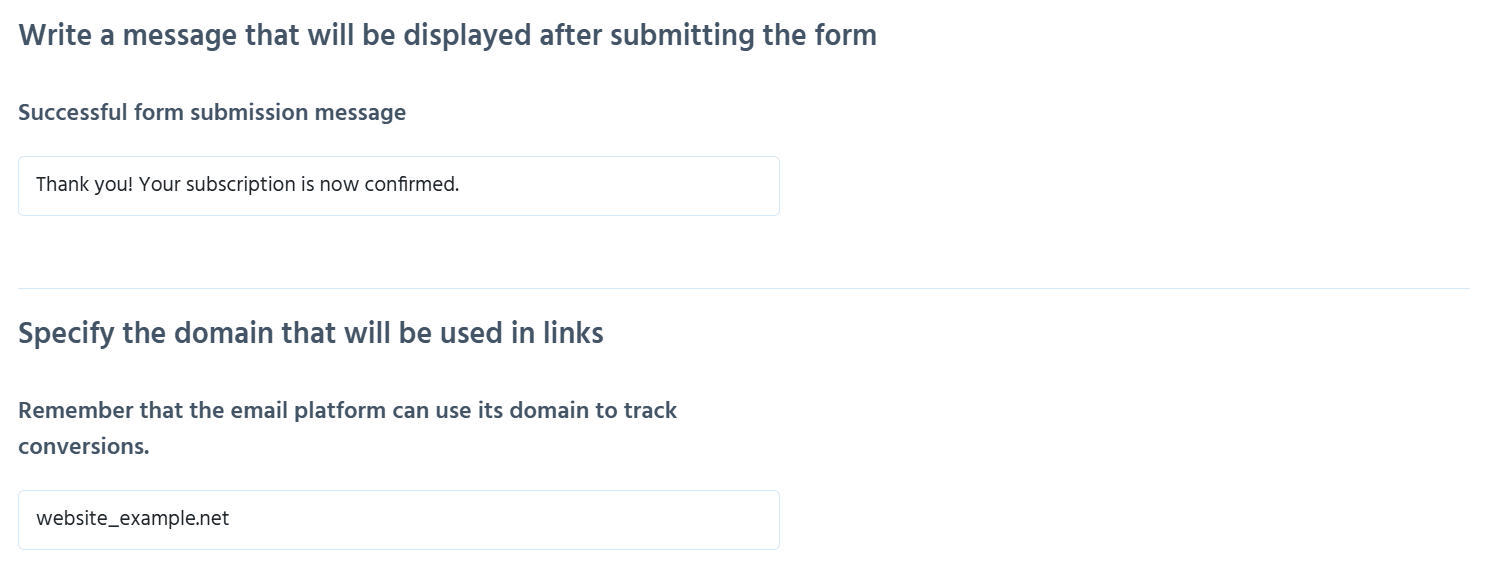
Next, click Create Component to open a new page that contains settings. Unlike other components such as Forms or Interactive Stream that include many different options, here you only need to specify two values for AMP-forward-link:
1. Successful form submission message. This is the text that the user will see immediately after confirming the action. It can be short (“Thank you, your subscription is confirmed!”) or more detailed, with additional instructions or an invitation to the next step.
2. Domain that will be used in links. Here, you need to specify the domain of the confirmation link. Note: if your ESP uses a click-tracking system, the domain may be changed when sending the email.
The AMP-forward-link operating principle is based on form submission and directly registers the action via the confirmation link. This means that there is no need to connect the email to external systems via webhooks or configure additional server-side events.
Once the parameters are set, click Save. The system will redirect you to the next screen that contains Action-xhr (the URL that processes the confirmation button request), ready-to-use HTML code, and a more compact TJML version of the code.
Structure of the Generated Code
The HTML code consists of two parts: a block for the email header (<head>) and a block for the email body (<body>). The <head> block includes the AMP scripts required to ensure proper functioning of the form, processing user actions, and displaying messages.
However, the main logic of the component resides in the <body> block. This is where the form with the action-xhr attribute is located:
1<form method="POST" action-xhr="https://app.pixcraft.io/amp/post/XXXX?key=YOUR_KEY" on="submit-success: AMP.setState({confFormXXXX: true})">
The request is processed by the Pixcraft server. In turn, the on="submit-success: AMP.setState(...)" parameter defines what will happen after the action is successfully completed.
The key element of AMP-forward-link is the confirmation link handling process. This is done through a hidden input field with name=”link”:
1<input type="hidden" name="link" value="${confirm}">
Here, ${confirm} must be replaced with the confirmation link in your platform’s syntax.
When there are no changes on the screen for some time, this may leave the impression that nothing is actually happening. To prevent this, a loading block is displayed while the request is being processed:
1 2 3<div class="loading" submitting> Loading... </div>
This can be a simple message with any text (such as “Please wait” or “In progress…”). Additionally, an image or animation can be used instead of plain text. In this case, it is appropriate to apply an overlay with absolute positioning so that the visual element appears above the form, giving it a neat, modern look.
In addition to the standard HTML code, you receive automatically generated TJML code. This is a special template markup syntax designed to simplify and speed up the coding of both AMP and regular HTML emails.
Compared to HTML, it offers the following advantages:
- Compactness. TJML code is shorter and lighter than the AMP-HTML implementation.
- Automation. Unlike the HTML version, you do not need to manually connect
amp-bind,amp-form, andamp-mustachefor the TJML code to work properly.
The TJML code for AMP-forward-link looks like this:
1 2 3 4 5 6 7 8 9 10<m-form action="https://app.pixcraft.io/amp/post/XXXX?key=YOUR_KEY" on="submit-success: AMP.setState({confFormXXXX: true})"> <div data-amp-hidden="confFormXXXX"> <m-button bgcolor="#7D4DA3">Confirm Subscription</m-button> <input type="hidden" name="link" value="${confirm}"> </div> <m-form-success>[[success]]</m-form-success> <div class="loading" submitting> Loading... </div> </m-form>
Connecting the AMP-forward-link component to your campaigns is easy: simply embed the ready-made code into your email, and it’s done. Once the campaign is launched, you will be able to:
- Track how many users confirmed the action via email.
- Collect and analyze additional data if a second screen with a form is provided in the email.
Conclusion
AMP-forward-link adds extended action confirmation capabilities to emails. Thanks to Pixcraft, creating the component and using it as part of email campaigns is possible without complex development. All that’s required is inserting the ready-made code into an existing email template.
Give Pixcraft a try for free! Sign up now for a 14-day trial and explore all the capabilities of our visual email builder firsthand.