Interactive Stream in AMP Emails: Next Level of Engagement
AMP technology has introduced a unique experience into email marketing by adding special capabilities for interactivity and personalization. Now, newsletters can not only stand out visually but also dynamically adapt to the reader’s interests and collect feedback directly within the email.
Yet Pixcraft’s Interactive stream goes even further, transforming an email into a communication space where subscribers can leave comments and see replies from others. In this article, we will discuss the benefits of this feature and how to implement it in email campaigns.
What Is Interactive Stream
Pixcraft offers a set of AMP components that make an email interactive and noticeably more engaging. These include:
- AMP-form, which allows users to embed a fully functional form inside the email. This can be a quick survey with single or multiple-choice options, or an invitation to leave the subscriber feedback. The collected data can be used for segmentation and analytics, such as RFM analysis.
- AMP-list, which makes it possible to load data from external sources and display dynamic content inside the email. This includes promotions and special offers, product selections, and layouts that change depending on the time of day.
- AMP-forward-link, which enables confirmation of subscription or registration directly within the email, without redirecting the user to a website.
- Interactive stream, which allows a subscriber to leave a comment directly in the email.
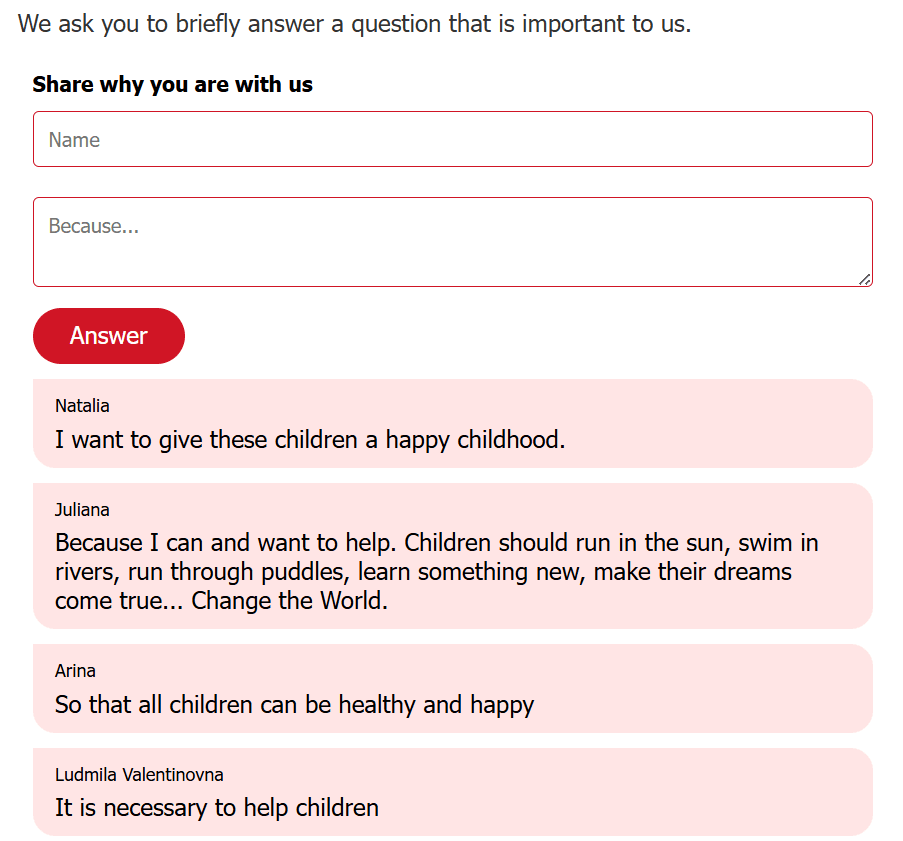
Thanks to the Interactive stream, the email is no longer a one-way channel where only the brand has a voice. Instead, it becomes a space for discussion and exchange of opinions:
- Recipients share their impressions and ask questions that become part of the overall conversation. This creates an atmosphere similar to a chat or comments on social networks.
- When real customer feedback appears in an email, it is perceived as a place for actual dialogue rather than a simple advertising campaign.
How to Create an Interactive Stream in Pixcraft
The process of creating and configuring an Interactive stream is largely similar to working with other AMP components.
Creating a Comment Field
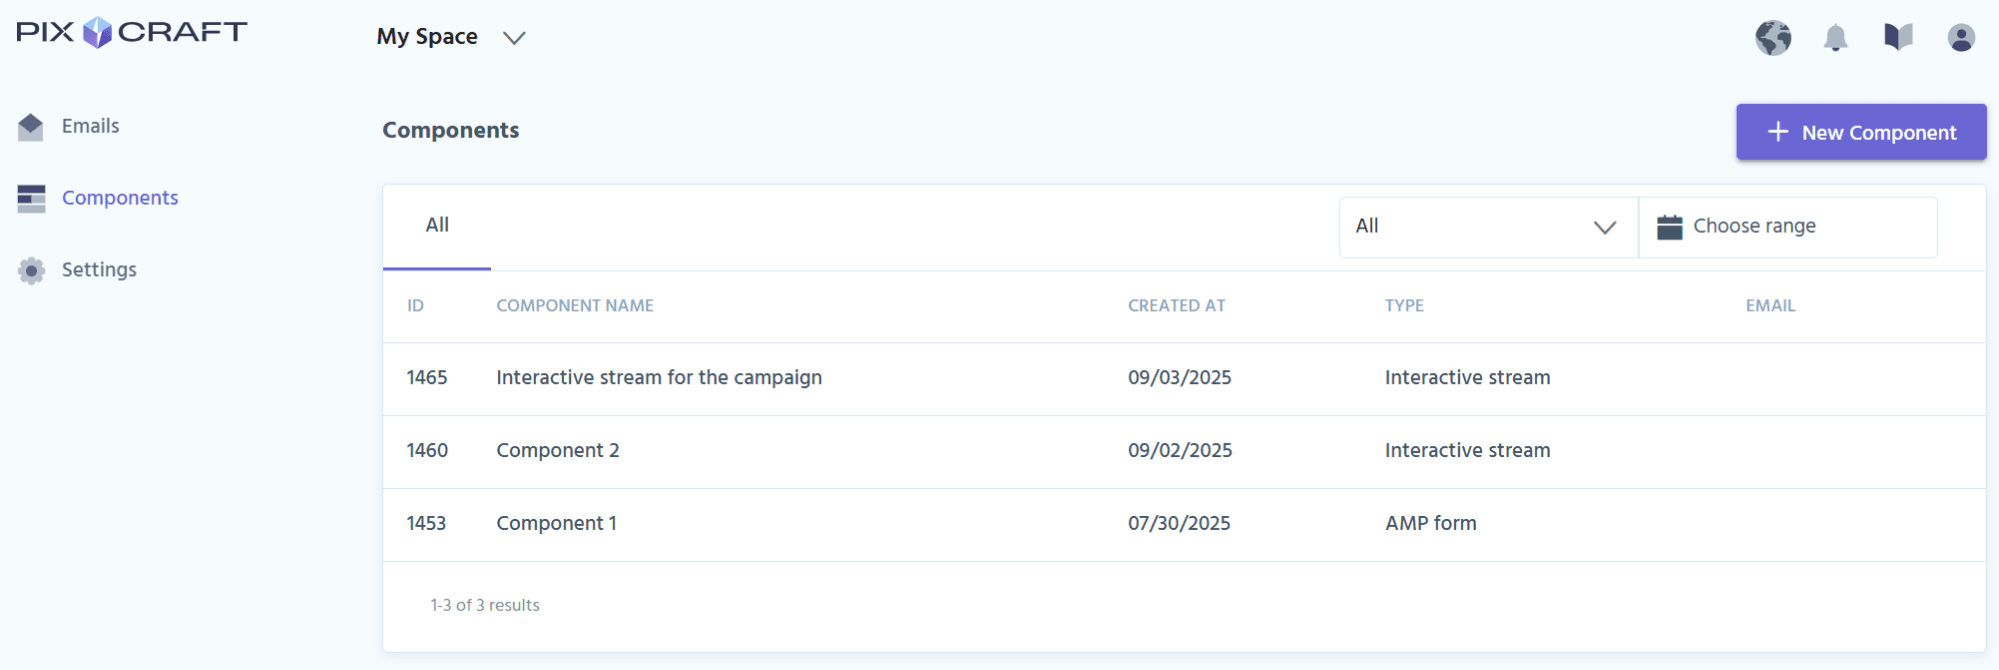
On the main screen of your profile, go to the Components menu and click the New Component button.
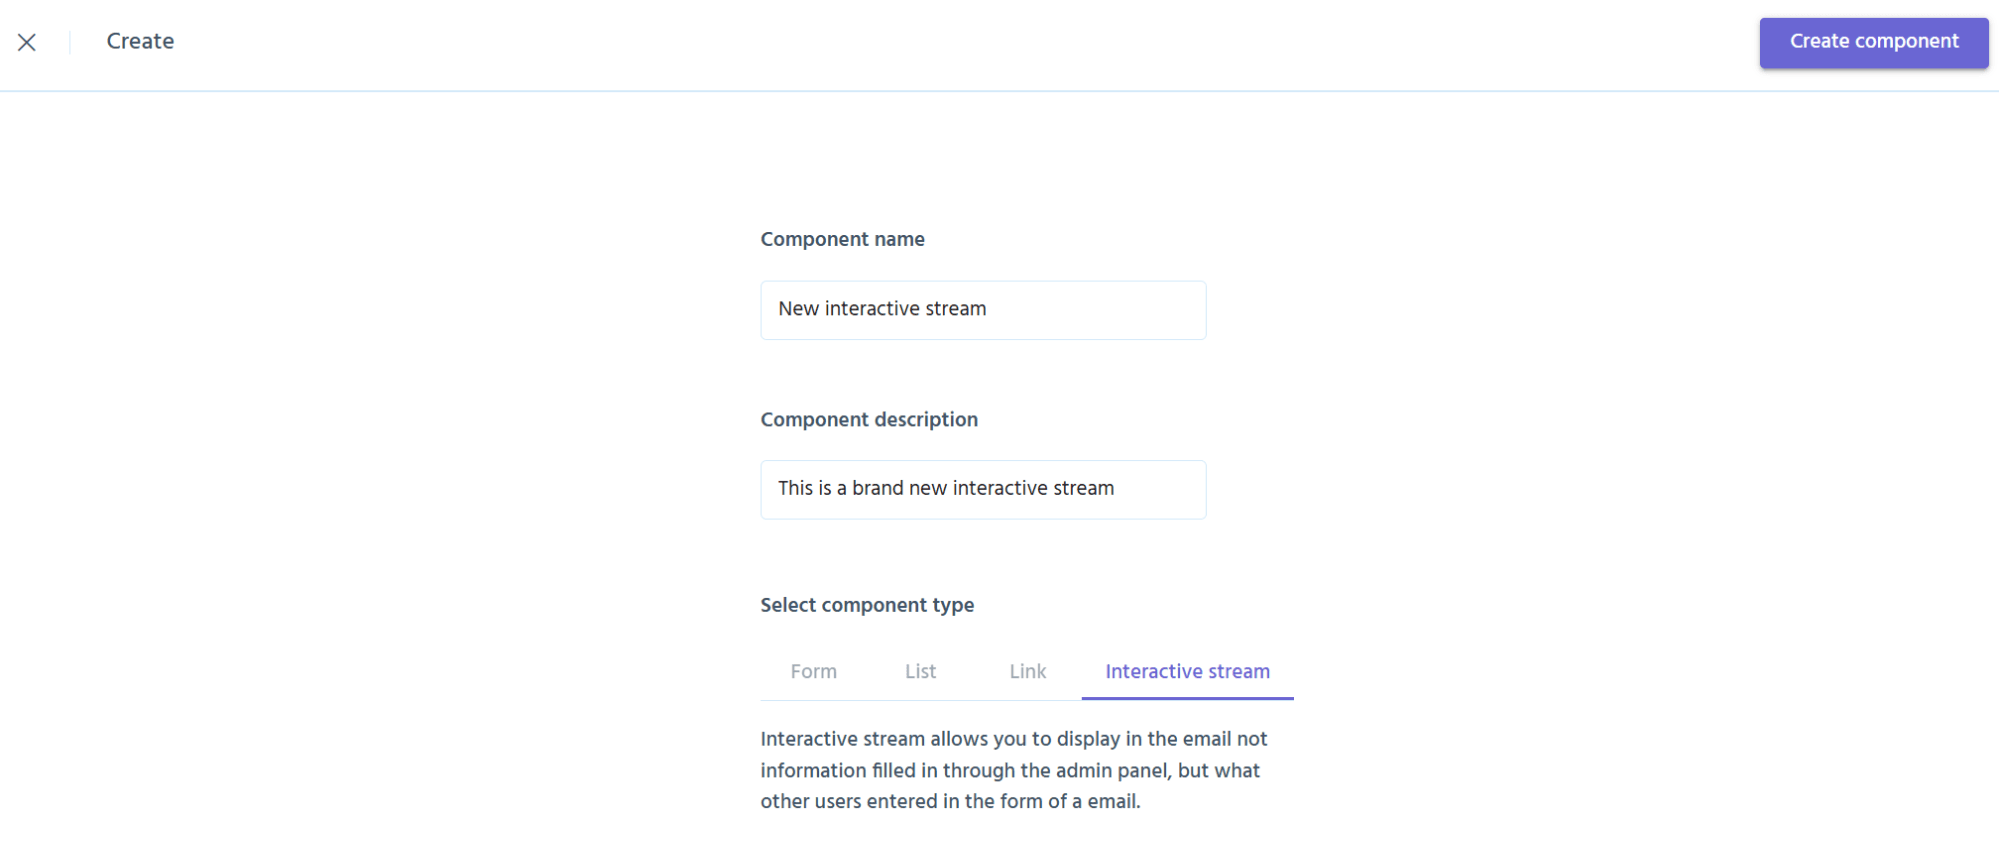
Select Interactive stream, specify a name (for example, “Feedback on the new collection” or “Newsletter comments”), and optionally add a short description. After that click Create Component.
Next, a configuration screen will open for the form through which subscribers will leave their messages. The logic is similar to creating a standard AMP form: use ready-made elements, drag them into the workspace, and combine them as needed.
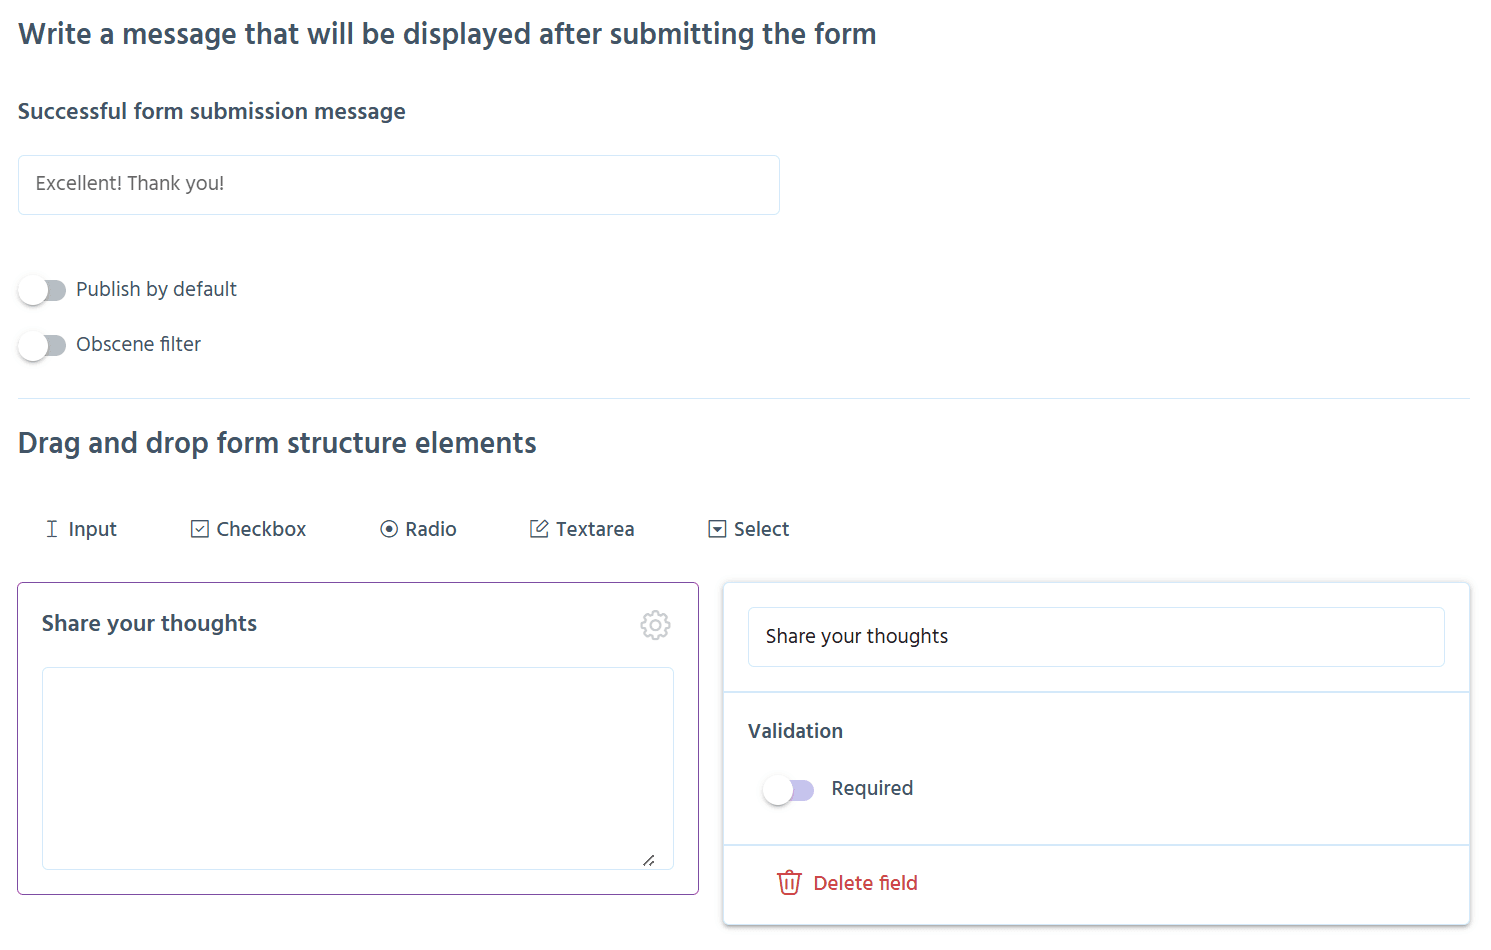
For a comment form, the best choice is Textarea — a multi-line field where the email recipient can enter feedback, a detailed comment, or a short message. Here, the following parameters can be configured:
- Field name — the displayed text that explains to the user what exactly needs to be entered.
- Validation — makes the field mandatory to fill in.
- Successful form submission message — an optional short text that confirms to the user that their comment has been received.
Moderation and Content Safety
Pixcraft allows users to choose whether comments are published automatically or only after a manual review. Two scenarios are available here:
- Post-moderation (“Publish by default” enabled). All new comments appear in the shared stream without prior review. This option provides immediate feedback and a strong “wow effect”: the subscriber sees that their message has instantly become part of the email.
- Pre-moderation (“Publish by default” disabled). In this case, each comment must pass moderator review in order to be published. After the approval, the comment becomes visible to other subscribers. This is convenient for sensitive topics where it is important to control the tone and content of the dialogue.
Additionally, the settings include Obscene filter, an automated system for detecting profanities in English and Russian. If a user enters inappropriate words, the filter recognizes those and replaces them with asterisks. This safeguard measure reduces the workload for moderators: even without manual review, offensive language will not appear in the email.
Once the form has been created and all parameters specified, click Save to open the Connection screen.
Connecting the Interactive Stream and Collecting Data
The next step is to configure how exactly the Interactive stream will behave in the email. For this, both basic connection parameters and ready-to-use HTML and TJML code are available.
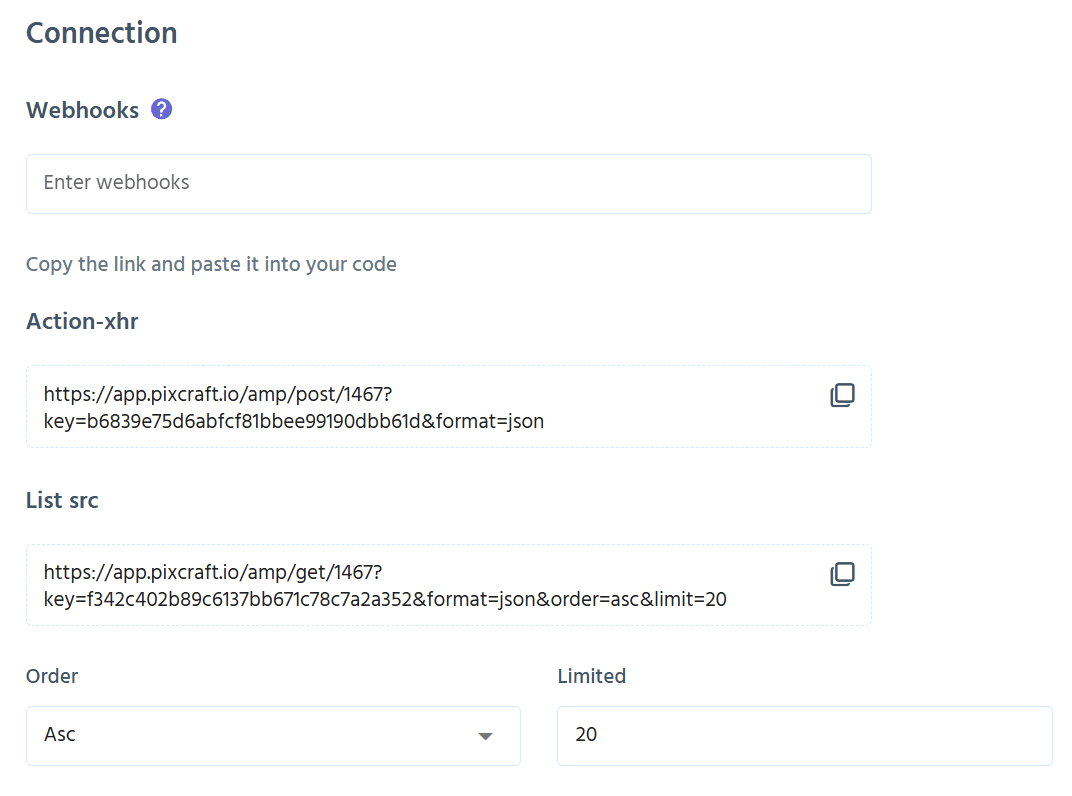
Webhooks. Here, the user can specify the URL of an external database or service to which Pixcraft will send a POST request every time a new comment is submitted via the form. This mechanism makes it possible, for example, to instantly receive notifications about new comments in a Telegram bot or any other system.
Immediately after a comment is submitted, a “data package” is generated and sent to the specified address. It includes:
componentId— Pixcraft component ID;campaignId— campaign ID (if the component is linked to the campaign);email— subscriber’s email address;date— event timestamp in UNIX format;owner— form’s owner ID;data— content inapplication/x-www-form-urlencodedformat.
More details on how webhooks work can be found in the documentation.
Action-xhr. The form handler address used during manual configuration. This is where the data is sent when the subscriber submits the comment.
List src. Also used during manual configuration. This is the data source from which all comments are loaded into the Interactive stream. Here, users can configure the number of messages displayed in the email at one time, as well as the order in which they appear:
Asc(ascending, from oldest to newest);Desc(descending, from newest to oldest);Rand(random comments from the source);
Default(default value).
Ready-to-use code snippets for integrating into the email include:
- HTML code for
<head>— ensures connection to AMP libraries and minimal styles. Below is an example of such a code:
1 2 3 4 5 6 7 8 9 10 11 12 13 14 15 16 17 18 19 20 21 22<script async custom-element="amp-bind" src="https://cdn.ampproject.org/v0/amp-bind-0.1.js"></script> <script async custom-element="amp-form" src="https://cdn.ampproject.org/v0/amp-form-0.1.js"></script> <script async custom-template="amp-mustache" src="https://cdn.ampproject.org/v0/amp-mustache-0.2.js"></script> <script async custom-element="amp-list" src="https://cdn.ampproject.org/v0/amp-list-0.1.js"></script> <style amp-custom> .wrap_list { position: relative; height: auto; min-height: 100px; } #wrap_listXXXX .commentlist { min-height: 100px; } #wrap_listXXXX .commentlist, #wrap_listXXXX .commentlist > div { position: static; } #wrap_listXXXX .commentlist > div { min-height: 100px; height: auto; } </style>
- HTML code for
<body>— defines the structure of the form and the block that contains the Interactive stream. This is the content that the user will see directly in the email. Such a code may look like this:
1 2 3 4 5 6 7 8 9 10 11 12 13 14 15 16 17 18 19 20 21 22 23 24 25 26 27 28 29 30 31 32 33 34 35<form method="POST" action-xhr="https://app.pixcraft.io/amp/post/XXXX?key=YOUR_KEY" on="submit-success: AMP.setState({confFormXXXX: true})"> <div [hidden]="confFormXXXX"> <div class="field"> <label>Share your thoughts</label> <textarea name="t_0847_share_your_thoughts_595" required></textarea> </div> <button type="submit">Submit</button> <input type="hidden" name="email" value="${email}"> </div> <div submit-success> <template type="amp-mustache"> {{success}} </template> </div> <div submit-error> <template type="amp-mustache"> Please fill in correctly {{#error}}<b>{{title}}<br></b> {{/error}} </template> </div> <div class="loading" submitting> Loading... </div> </form> <div class="wrap_list" id="wrap_listXXXX"> <amp-list class="commentlist" id="shortlist" layout="fill" src="https://app.pixcraft.io/amp/get/XXXX?key=YOUR_KEY"> <template type="amp-mustache"> <div class="list-card"> <div class="list-item"> Share your thoughts <div>{{t_0847_share_your_thoughts_595}}</div> </div> </div> </template> </amp-list> </div>
- TJML — a ready-made framework by Pixcraft. It allows to combine HTML and AMP content of the email in a single codebase. Here’s an example:
1 2 3 4 5 6 7 8 9 10 11 12 13 14 15 16 17 18 19 20 21 22 23 24 25<m-form action="https://app.pixcraft.io/amp/post/XXXX?key=YOUR_KEY" on="submit-success: AMP.setState({confFormXXXX: true})"> <div data-amp-hidden="confFormXXXX"> <div class="field"> <label>Share your thoughts</label> <textarea name="t_0847_share_your_thoughts_595" required></textarea> </div> <m-button bgcolor="#7D4DA3">Submit</m-button> <input type="hidden" name="email" value="${email}"> </div> <m-form-success>[[success]]</m-form-success> <m-form-error>Please fill in correctly [[#error]]<b>[[title]]<br></b> [[/error]]</m-form-error> <div class="loading" submitting> Loading... </div> </m-form> <div class="wrap_list" id="wrap_listXXXX"> <m-list class="commentlist" id="shortlist" layout="fill" src="https://app.pixcraft.io/amp/get/XXXX?key=YOUR_KEY"> <div class="list-card"> <div class="list-item"> Share your thoughts <div>[[t_0847_share_your_thoughts_595]]</div> </div> </div> </m-list> </div>
From the recipient’s perspective, the Interactive stream resembles interactions in social networks or messenger apps:
- The subscriber fills out the form and clicks the button.
- The data is sent to the server.
- AMP-list loads new comments from the List src. If Publish by default is enabled, the comment is displayed immediately. If pre-moderation is active, the comment becomes visible only after manual approval.
Before sending the campaign to a wide audience, be sure to test the email across different email clients to ensure that AMP elements are displayed and function correctly.
How to Collect Statistics and Manage Comments
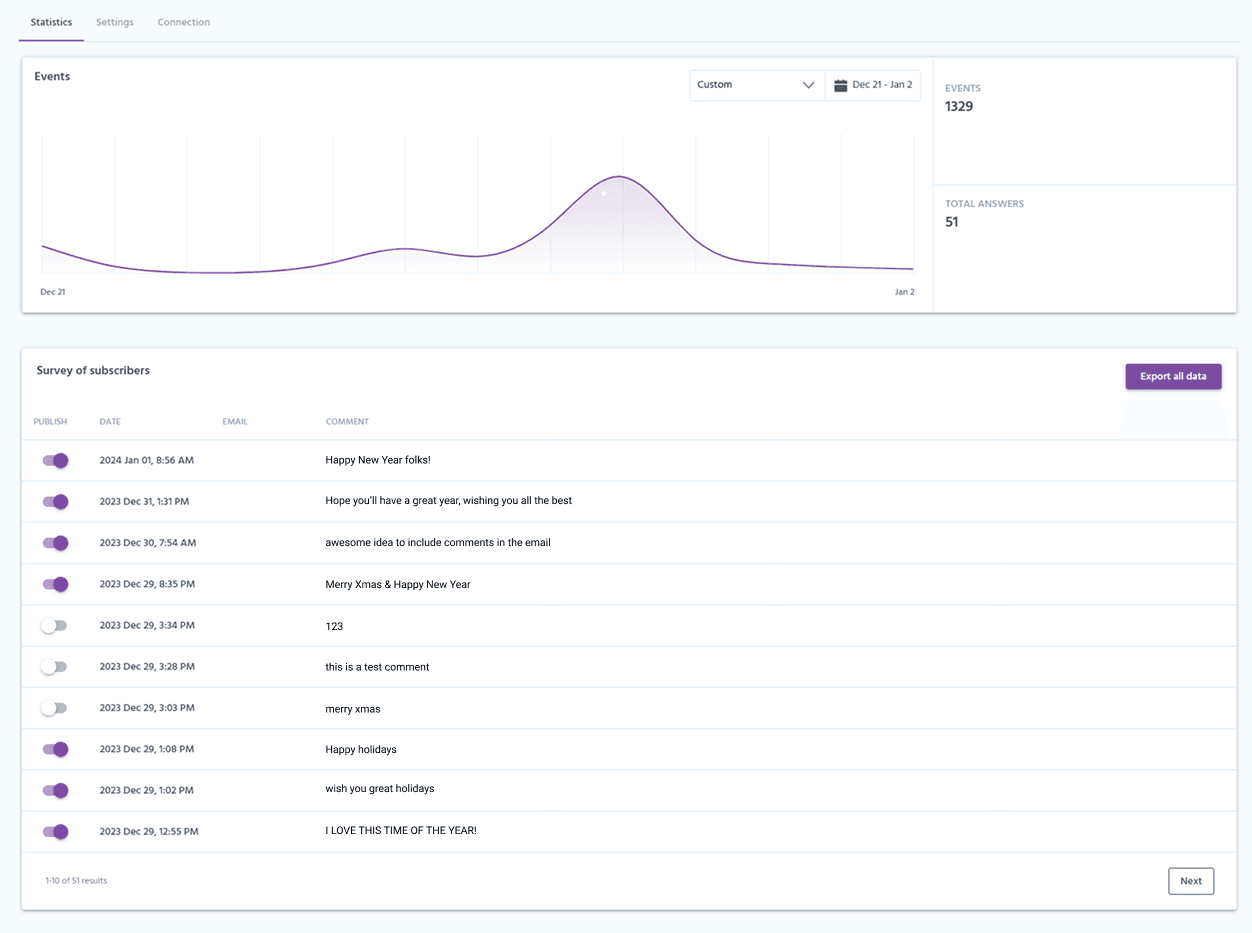
Once the Interactive stream is ready, the user gains the ability to track subscriber activity and manage their comments. To do this, go to the Components section and select the required Interactive stream. Clicking on it opens the Statistics section.
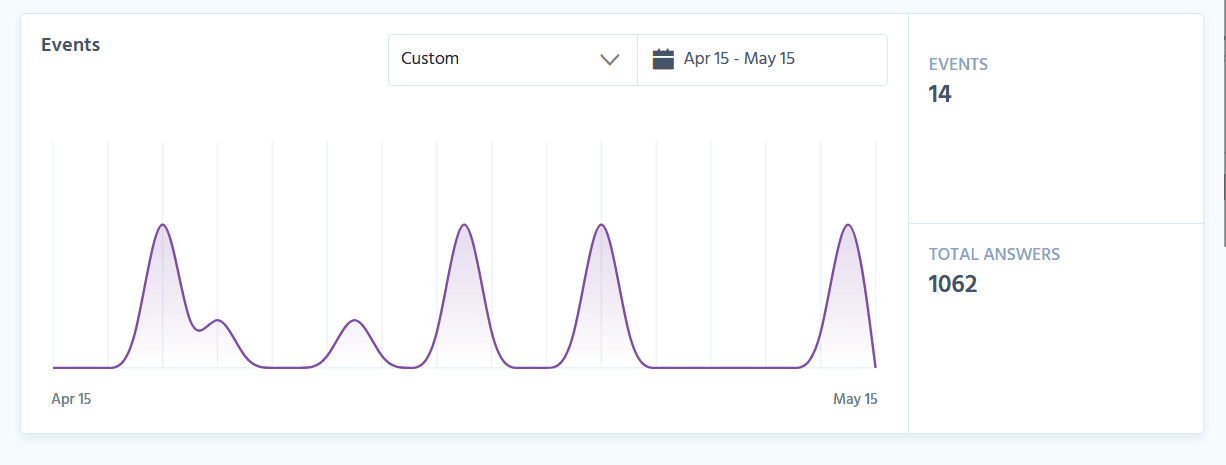
This section gathers all information about user interactions:
- comments;
- events related to the form;
- metrics for the entire period or for a selected timeframe.
Moderation also takes place here: a toggle allows the user to manually approve or reject a comment.
It is possible to change the parameters of the Interactive stream at any time after its creation. For this, simply go to the Settings or Connection sections to make the necessary adjustments. This allows users to:
- quickly adjust moderation rules;
- change the text shown in the form;
- reuse the stream in other campaigns without having to rebuild it from scratch.
How to Add a Hidden Field for Displaying a Name
A mechanism that automatically inserts random nicknames allows to add individuality to the Interactive stream. For example, if the form does not provide for entering a name, the system will automatically substitute a value from a predefined list.
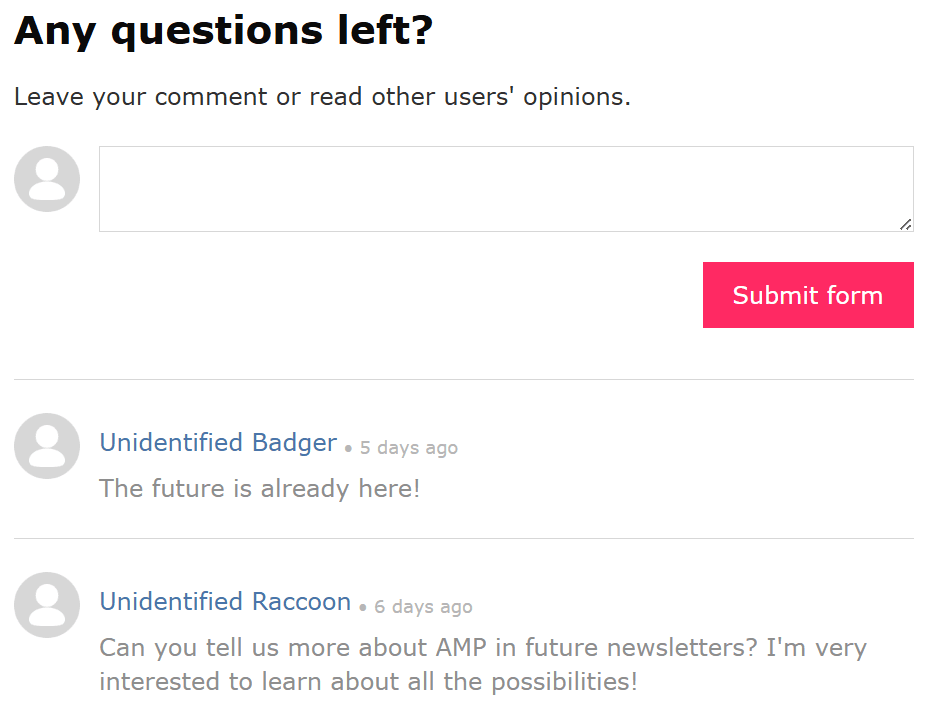
Technically, this is implemented through hidden fields. An array of value options (for example, “Unidentified hedgehog”, “Unidentified kitty”, and similar ones) is sent to the field, after which the system randomly selects one of those and uses it as the name.
In the code, the mechanism looks like this:
1<input name="some_name" type="hidden" [value]="['Unidentified kitty', 'Unidentified elephant','Unidentified dragon','Unidentified axolotl','Unidentified turkey'][floor(random() * 4)]" />
This seemingly small detail makes the Interactive stream more friendly and informal. Subscribers are more willing to leave comments if they are not required to enter their name, and the dialogue in the email becomes livelier thanks to lighthearted and amusing nicknames.
It is important to note that to use this substitution, the state must change at least once before the form submission (on="tap:AMP.setState({})"). This can be done natively by hiding the form under a button or spoiler: when opened, the value is calculated and inserted automatically.
Conclusion
Thanks to the Interactive stream, an email transforms from a simple information delivery channel into a communication platform. Feedback is collected instantly, and engagement grows thanks to active dialogue.
Pixcraft provides all the tools necessary for convenient launch and management of this format. Combined with other AMP components, the Interactive stream becomes an excellent addition that makes your email campaigns even more impactful.